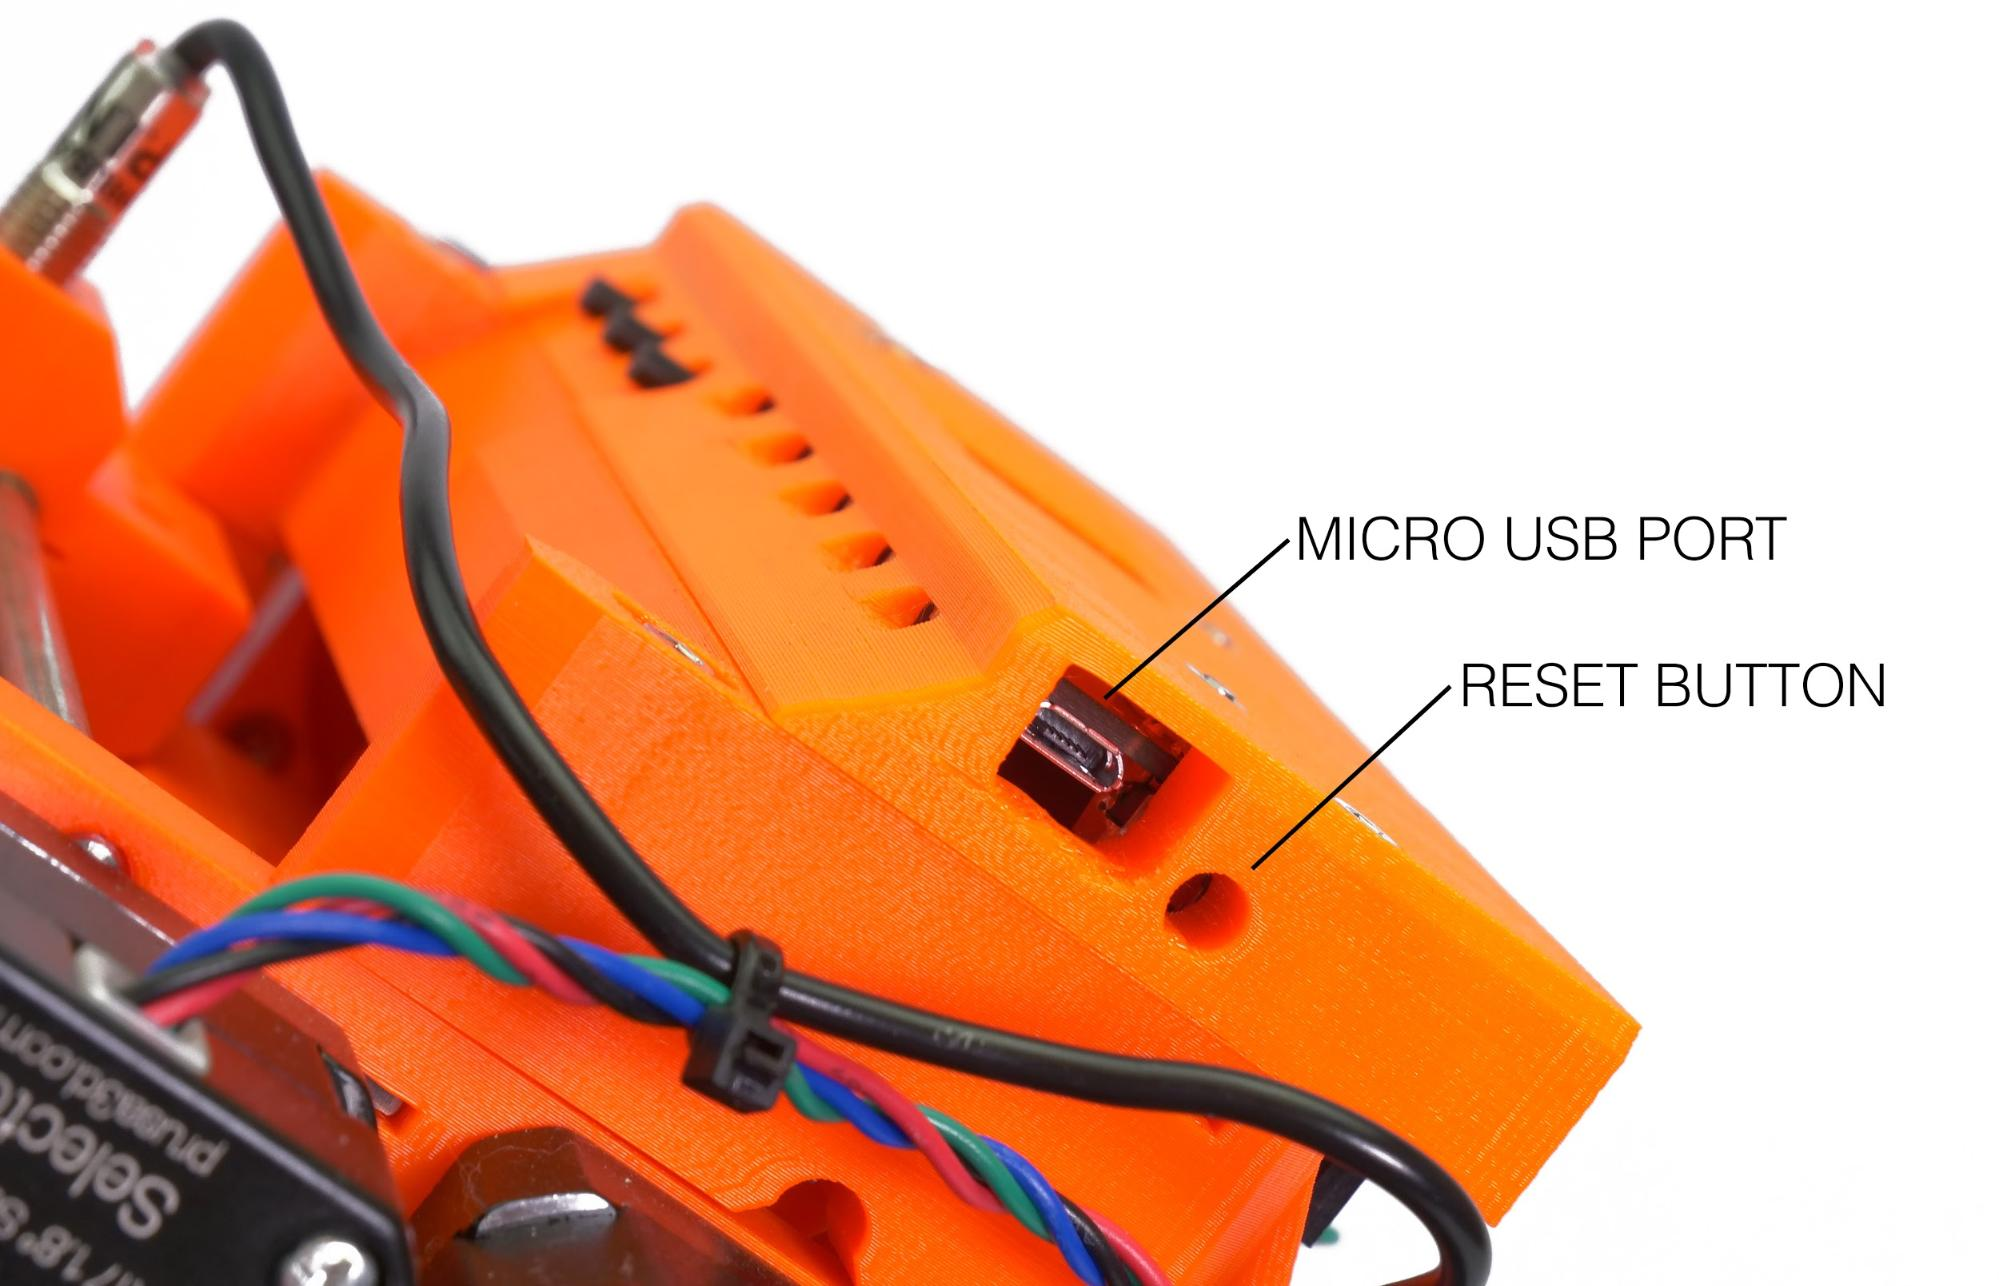
As the MMU unit has its own separate logic board, it also has its separate firmware that is cooperating with the printer firmware. This MMU-specific firmware is flashed directly to the MMU2S unit, using the micro USB port.
On the right side of the MMU unit, there is a reset button. You can push it with an Allen key or with a similar thin, hard object. This button serves as a soft reset: it makes the MMU go through the initialization sequence and makes the selector return to the default position. This button does not serve for factory reset.
Factory resetting the MMU2S firmware
Note that the factory reset is a hard reset of the MMU firmware: it will delete the filament length calibration values. The MMU2S will calibrate the filament length automatically and store this value. The firmware version will not be changed.
- The printer and the MMU must be on. Press and release the printer reset button (marked X and positioned under the control knob on the LCD panel).
- Immediately after releasing the X button, press the middle black button on the MMU unit and hold it.
- Release the button only when in the first LED position, both the green and the red LEDs are on, and at the same time, in the fifth LED position, the red LED is on. See the photo below.
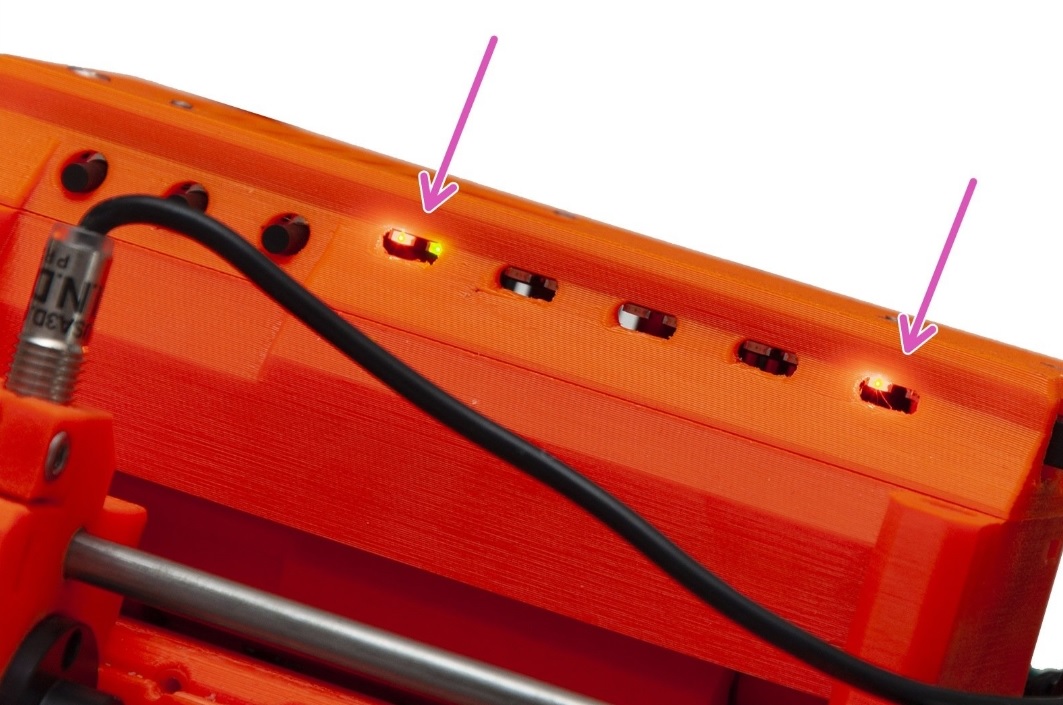
- You have now entered the Service menu. Click the left MMU button 3 times. The red light at the fifth position will move to the second position, while the red and green lights in the first position will still be on.
- Press (click) the middle button. This will unlock the MMU EEPROM erase function. There is no visual confirmation of that.
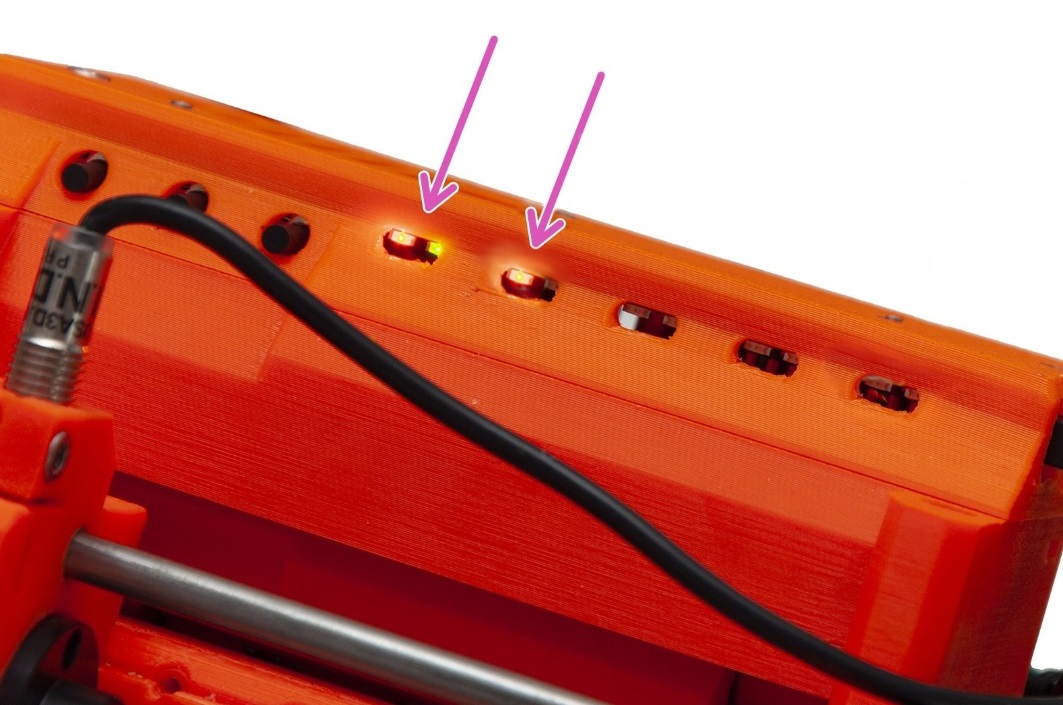
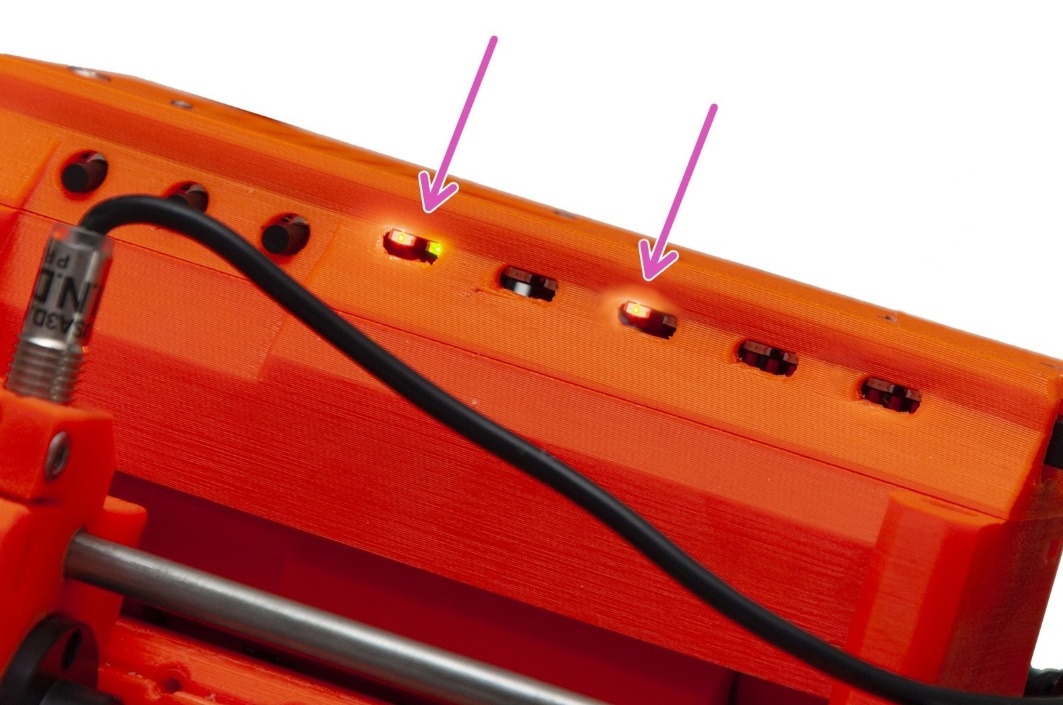
- Press the right button once to select the LED n. 3. This means the red light will now move from the second position to the third position, while the red and green lights in the first position will still be on.
- Press the middle button. This will definitely erase the MMU EEPROM. The process takes a while.
- Wait until the board erases its memory and restarts itself. All LEDs will flash once, then the first LED will turn green. The board is now erased and ready.
1 comment
Hi, it's not necessary to re-calibrate them anymore with MK3S MMU2S.
If you still use the old version without IR sensor, please follow this guide: https://help.prusa3d.com/en/Guide/Service+menu+-+Individual+Filament+Calibration/842