Organic supports are a type of support structure available in PrusaSlicer.
PrusaSlicer previously always used a 2D grid-based approach to generate supports. Although this method delivered decent results in many situations, it had its limitations. The supports often consumed quite a lot of filament, took a long time to print, ended up in spaces where they were difficult to remove from, and left visible marks on the model when removed. Especially when the settings were not tuned correctly. We improved some of these downsides by introducing the “Snug” supports in PrusaSlicer 2.4.
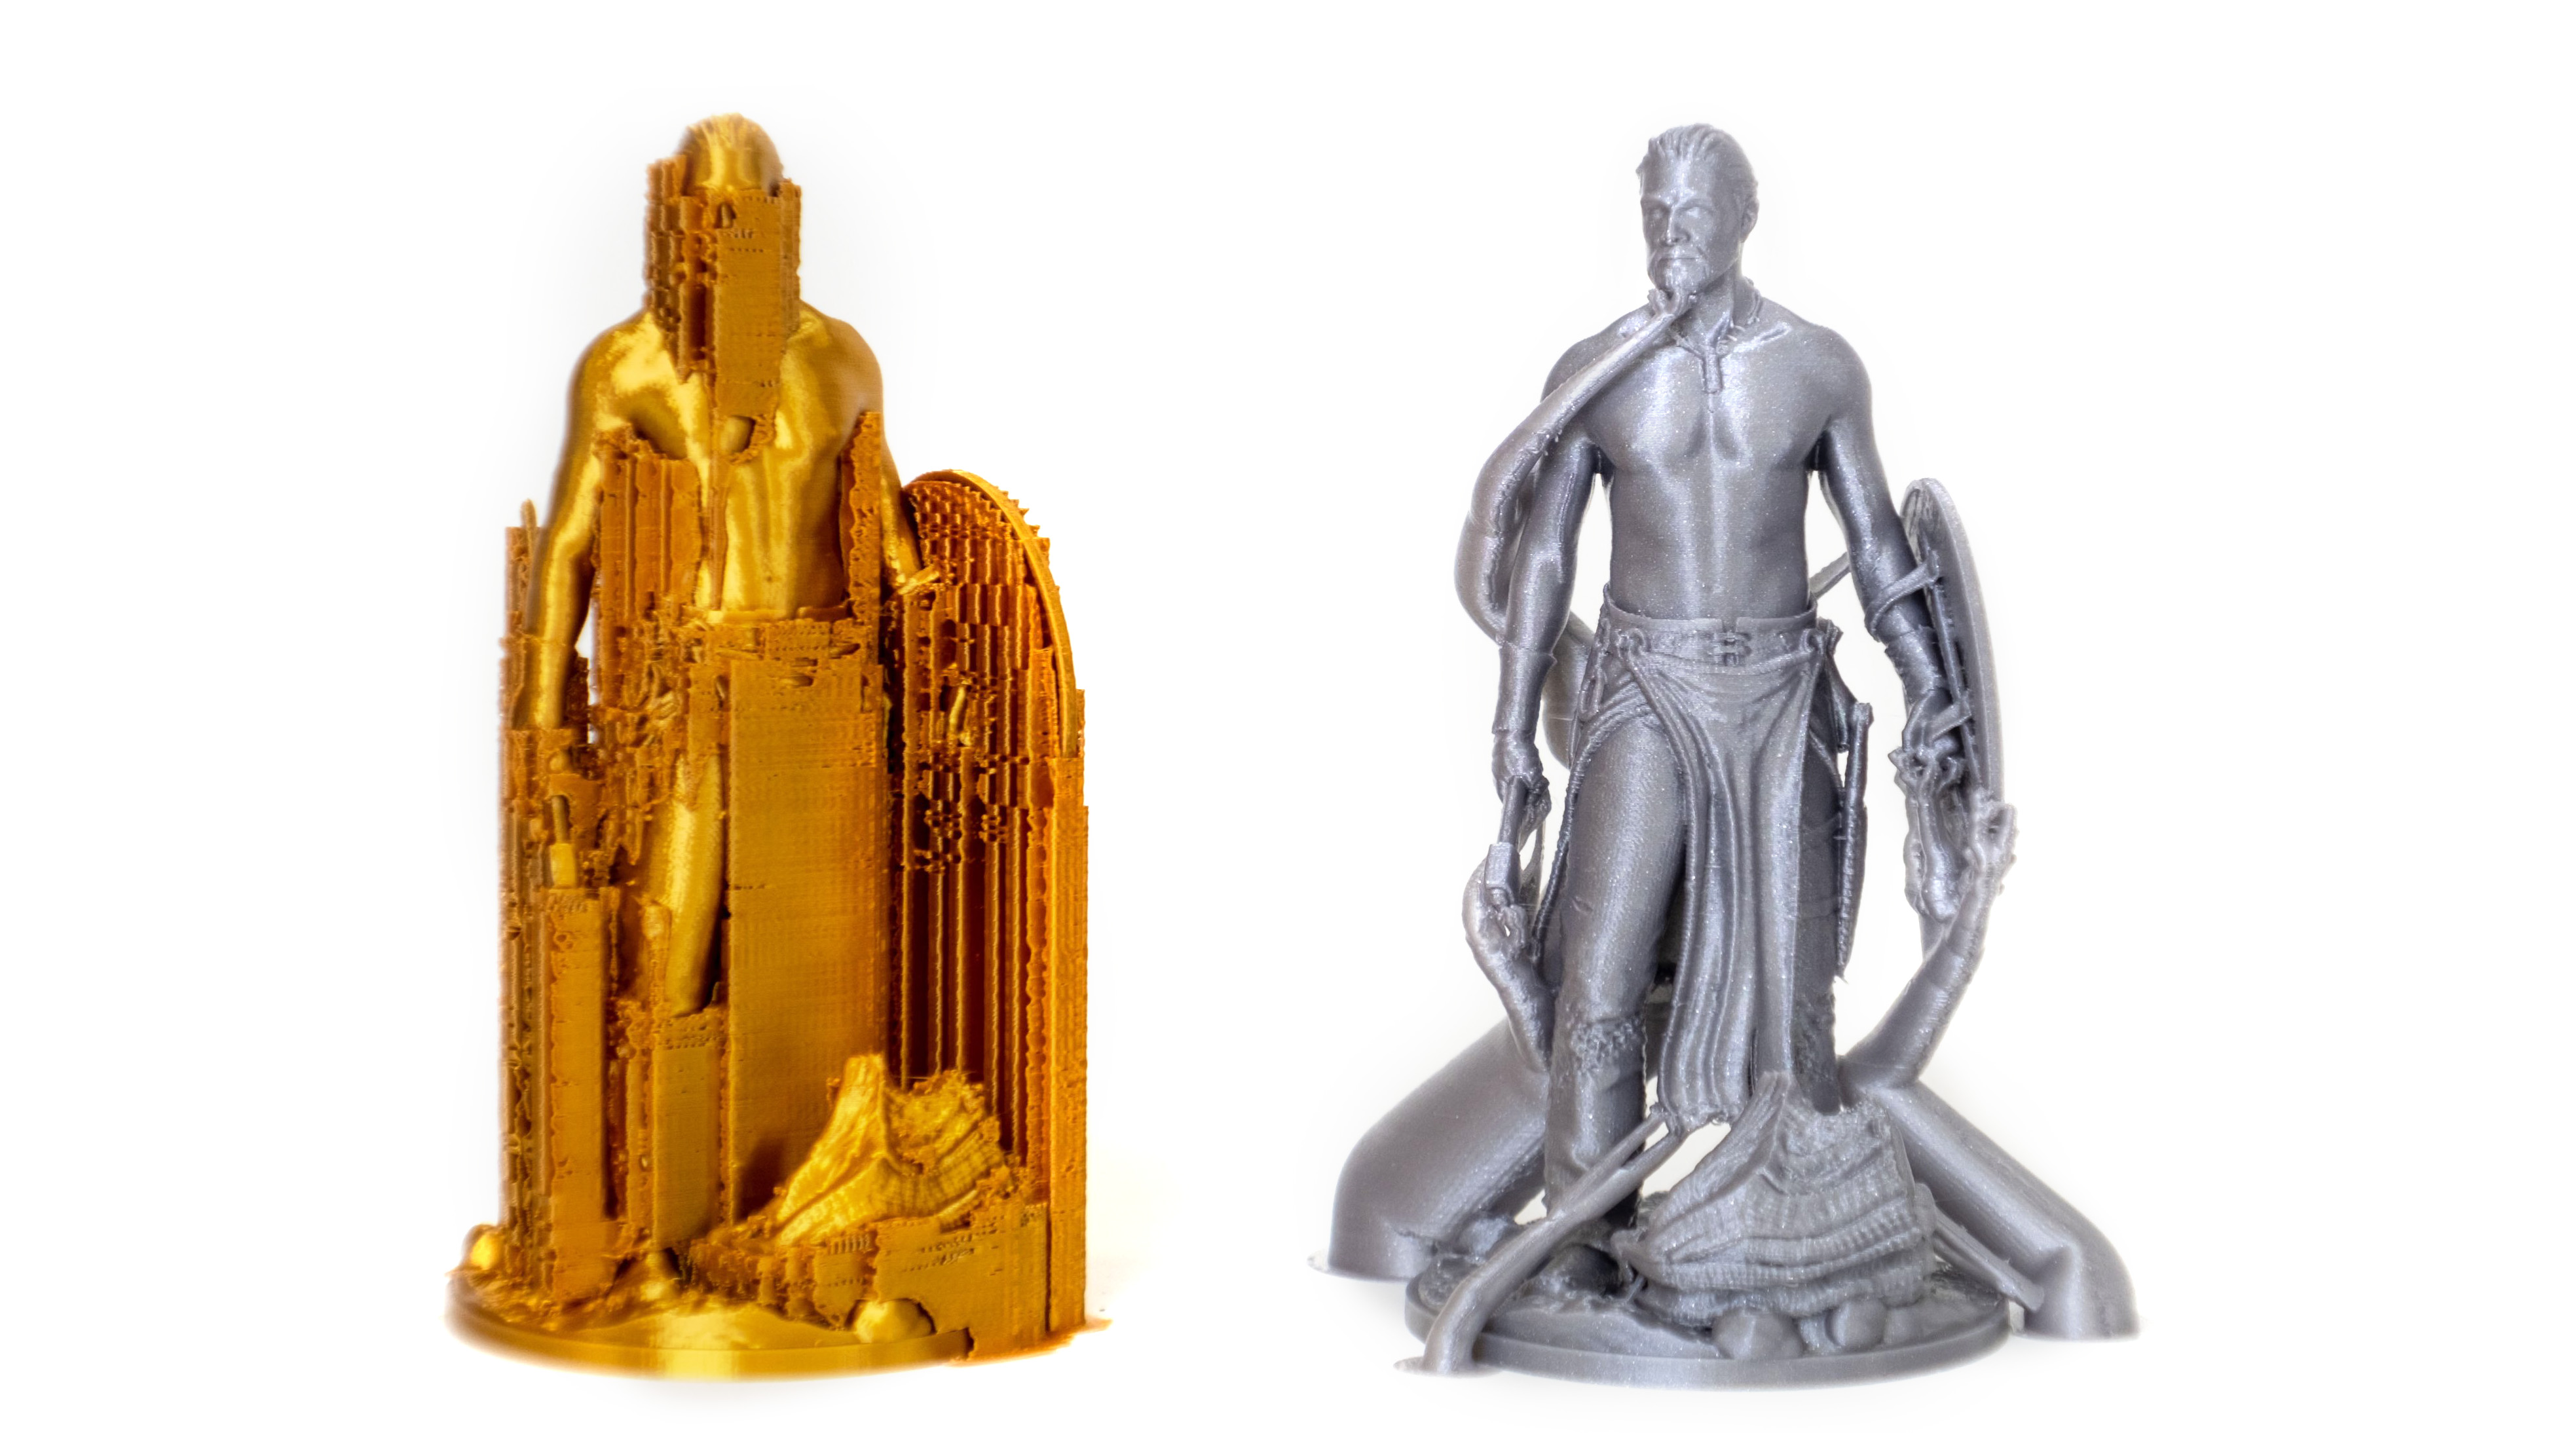
The Organic supports are our significantly improved implementation of tree supports. We choose a new name for our supports because of their distinctly smooth shape and several differences in their behavior.
In contrast to the previously common implementation of tree supports, the branching of Organic supports is smarter and we made them straighter (shorter), smoother, and more stable. The cross-section perpendicular to the branch axis is guaranteed to be circular, and the algorithm automatically uses double perimeter walls for the trees where needed (this is configurable).
Organic supports are easily removable, do not scar the surface, and are fast and cheap to print.
After you turn on Support generation, you can switch to Organic supports in Print settings - Support material - Style.
Apart from the settings common for all support types, there are additional settings specific to the Organic supports.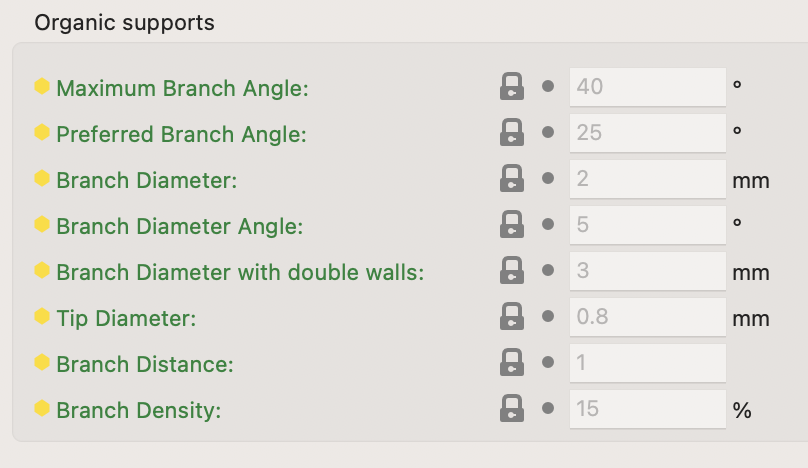
Organic supports settings
Maximum Branch Angle
The maximum angle of the branches, when the branches have to avoid the model. Use a lower angle to make them more vertical and more stable. Use a higher angle to be able to have more reach.
Preferred Branch Angle
The preferred angle of the branches, when they do not have to avoid the model. Use a lower angle to make them more vertical and more stable. Use a higher angle for branches to merge faster.
Branch Diameter
The diameter of the thinnest branches of organic supports. Thicker branches are sturdier. Branches towards the base will be wider than this.
Branch Diameter Angle
The angle of the branches' diameter as they gradually become thicker towards the bottom. An angle of 0 will cause the branches to have a uniform thickness over their length. A bit of an angle can increase the stability of the organic supports.
Branch Diameter with Double Walls
Branches with an area larger than the area of a circle of this diameter will be printed with double walls for stability.
Set this value to zero for no double walls.
Tip Diameter
Branch tip diameter for organic supports.
Branch Distance
How far apart the branches need to be when they touch the model. Making this distance small will cause the tree support to touch the model at more points, causing better overhangs printing but making the supports harder to remove.
Branch Density
Adjusts the density of the support structure used to generate the tips of the branches. A higher value results in better overhangs but the supports are harder to remove. We recommend keeping the top support interfaces enabled instead of using a high branch density value if dense interfaces are needed.
Organic supports can be manually enforced or blocked using the Paint-on supports tool.
9 comments
Hello Prusa Family.
My THANKS for any help.
I’m a beginner. I’ve been fiddling with two Mk3’s (Loaners) and became increasingly frustrated. (1st layer problems) I returned them both to the owner.
Then I purchased a new fully assembled MK4S. So far I am very happy with it using PLA.
Recently a build from Printables said to use PETG. I purchased a PETG filament that was on the slicer filament list. Overture. (My MK4s, Prusa slicer etc. all up to date, firmware as well. I am using the textured, recommended build plate)
The slicer recommended “supports” I set the supports to Organic and printed. (I previously used PLA and while the print was fine, the build needed PETG)
The organic supports were difficult to remove, one was so tight it left a lump of PETG. I filed it down but the print was ruined.
Is there any help for setting up the Organic support settings?
The print I am trying to make is below. The PLA print is fine, supports snap off cleanly. It just doesn’t fit the frame properly. Vibration kicks it off.
https://www.printables.com/model/695578-camera-mount-tapo-c100-on-prusa-mk4
Once again my thanks.
Tom
I will try what you suggest, and will definitely let you know how it works out.
Thank you for the help.
Happy Thanksgiving to all.
Tom
Hi Jan
I went into the slicer and made the recommended changes.
Before I start, I think I noticed a software error.
I changed the style to “Snug”. When I hover over the down arrow in “top interface layers“ a text field pops up, stating that the default level is 3 heavy. When I actually click on the down arrow, the default level is stated as 2 “Default”.
I set the style to organic, and get the same results. Hover over the down arrow on “top interface layers” and the pop-up proclaims 3 heavy is the default. When you click on the down arrow to make a selection, it reports that the default level is 2 Default.
I imagine that my first print had the organic support “top interface layers” set to heavy which they certainly were in my print.
I am going to try using snug as you suggested with the top interface layers set to 2 default.
I will certainly let you know how the print turns out.
Tom
P.S
The print came out very well thank you. I set the supports for snug and the Top interface layers at 2.
It was still a little difficult, removing the supports, after they were all removed. The surface was relatively clean.
If I decide to make another one, I would set the top interface layer at 1.
Thank you again for your help, in resolving this problem.
I would like to hear your remarks about the default settings as mentioned in the message before the Post script.
Enjoy your weekend
Tom