PrusaSlicer has a fairly simple user interface. Most of the screen is dedicated to the 3D view, which is used to manipulate 3D models. The top toolbar (1, 2) adds and removes objects. The left toolbar (4) has tools for manipulation with 3D models, such as the scale or rotate tool. The right panel is used mainly to select a print, filament, and printer profile (6, 7, 8) and to choose whether or not to generate supports or brim.
The “Slice now” button (5) is used to generate G-code, which can then be exported to an SD card or sent directly to a printer. Some of the advanced functions are hidden by default, you can enable them later by switching to the Advanced or Expert mode (12).
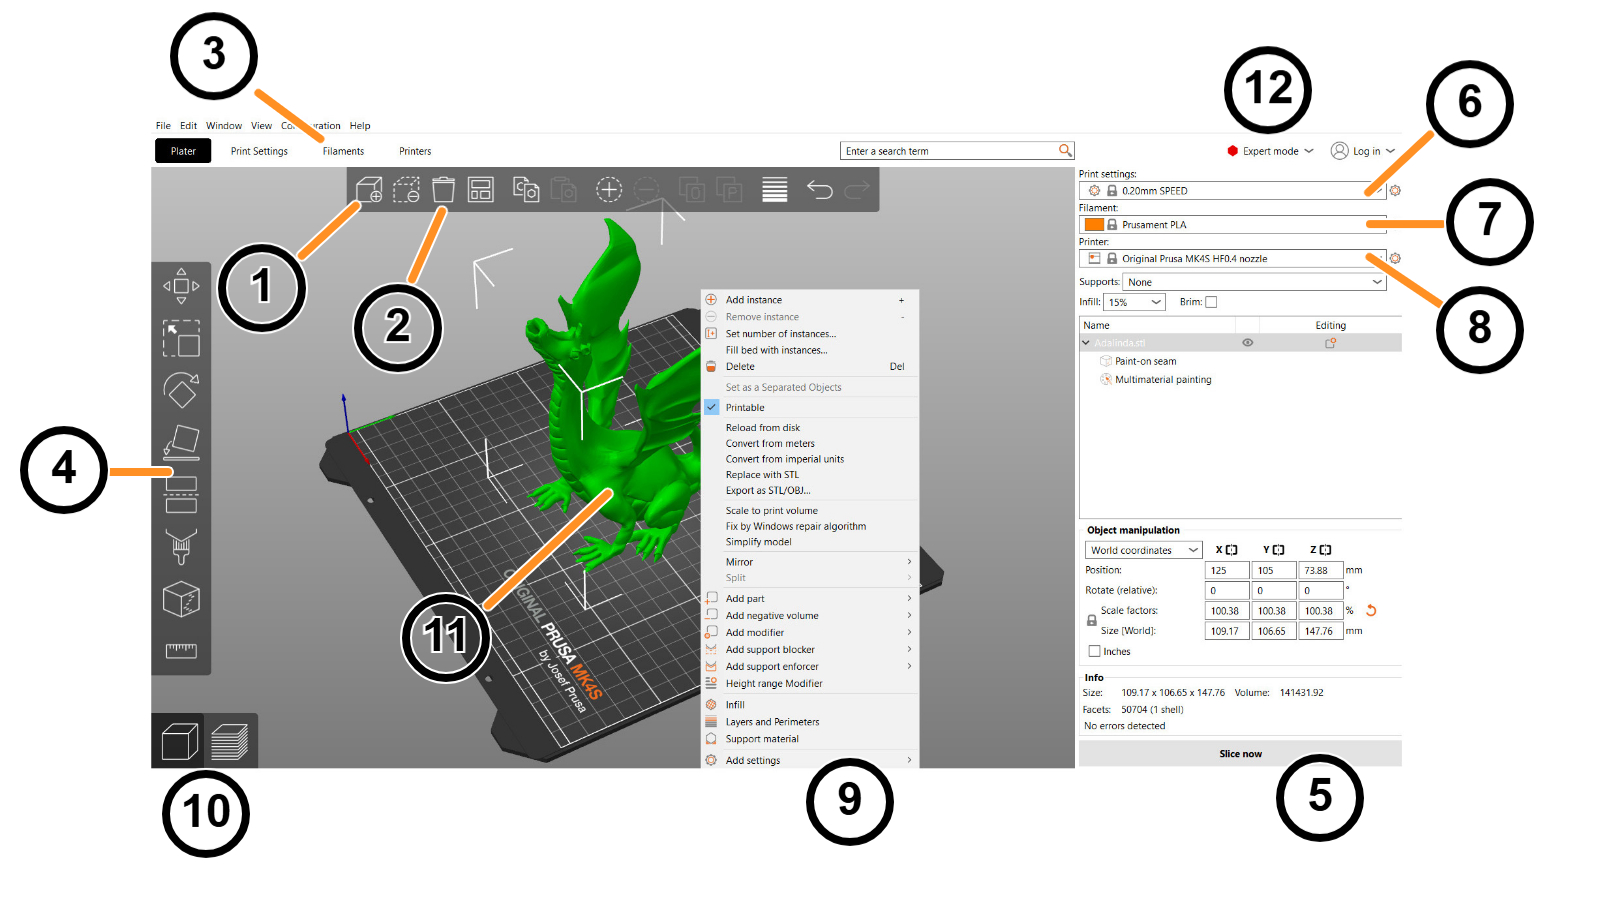
- The Add button loads models into PrusaSlicer
- Delete and Delete All buttons remove the model(s) from PrusaSlicer
- Opens detailed settings of print, filament, and printer
- Move, Scale, Rotate, Place on Face and Cut tools
- Slice and generate the Gcode button
- Layer height and speed of a print
- Material selection
- Printer selection
- Right-click on the model to open a context menu
- Switch between 3D editor and layers preview
- Model preview
- Switch between Simple / Advanced / Expert mode
Was this article helpful?
This action is available only to registered users. Please log-in.
2 comments
We don't have this documentation yet. Please contact our customer support and they can help you.
The sentence about the right panel should mention the object list, at least.