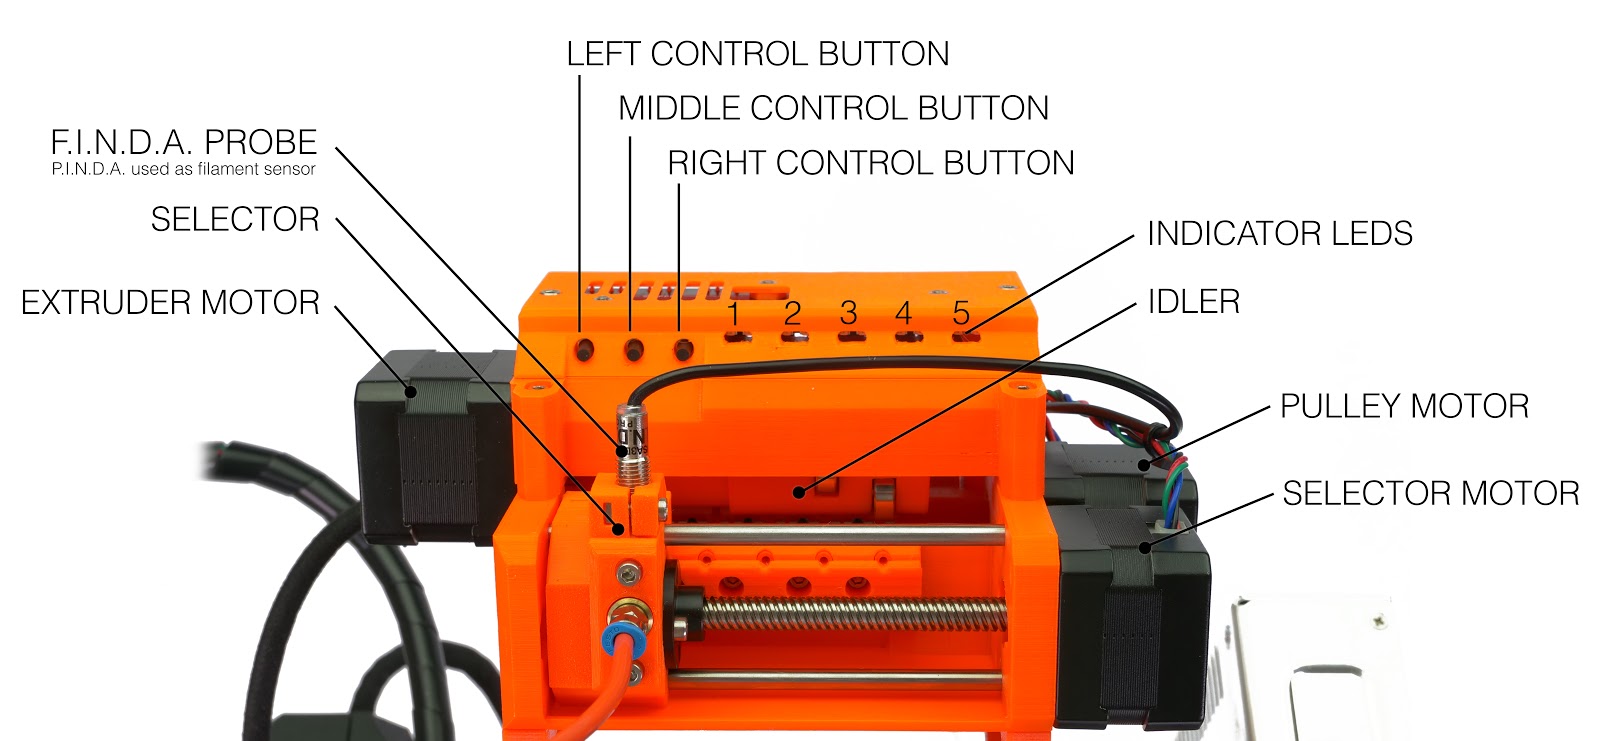
For future reference, see the picture below and try to remember the name of each part of the MMU unit. You will find this information in your printed MMU handbook as well.
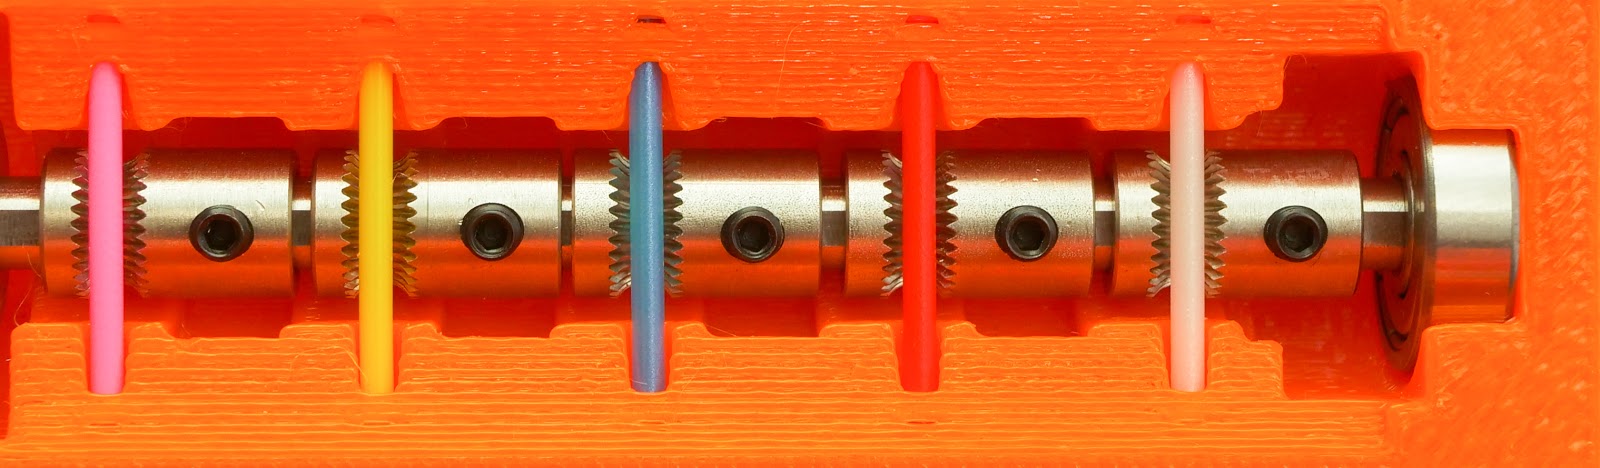
Hobbed pulleys - centered, tight, clean
The pulleys may be grinding the filament and its dust may accumulate around them. The best practice is to clean the pulleys with a mini-brush or some similar tool every now and then. The pulleys also must be perfectly aligned with the filament holes, as shown on the photo below, and well tightened by the small black grub screw against the flat part of the Pulley motor axis.
Clogged selector
Even a properly calibrated selector can be occasionally blocked with filament strings or dust or by a broken piece of filament. By pushing the right MMU button, move the selector fully to the right, to the service position. Use an interdental brush or any thin wire (⌀ 1.5mm/0.06”) to push the waste through (still in service position). Use compressed air to clean any leftovers.