English
Login

Auto-arrange tool

Relevant for

MMU family
MINI family
MK3 family
OLD PRODUCTS
SLA family
20 comments
Article is also available in following languages
English
Čeština
Polski
Deutsch
Français
Español
Italiano
日本語

When you import multiple models or create many instances of the same model, arranging them on the print bed could be very time-consuming. PrusaSlicer features an auto-arrange tool that distributes the objects over the entire Print bed with a reasonable gap between them. Auto-arrange can be initiated either by hitting the A key or by picking the Auto-arrange from the top toolbar.

Partial arrangement

The Auto-arrange tool can be used to arrange only a subset of the objects on the bed while keeping the position of unselected objects unchanged. This can be achieved by selecting the set of objects and hitting the Arrange button while holding down the Shift key, or pressing the Shift + A hotkey.

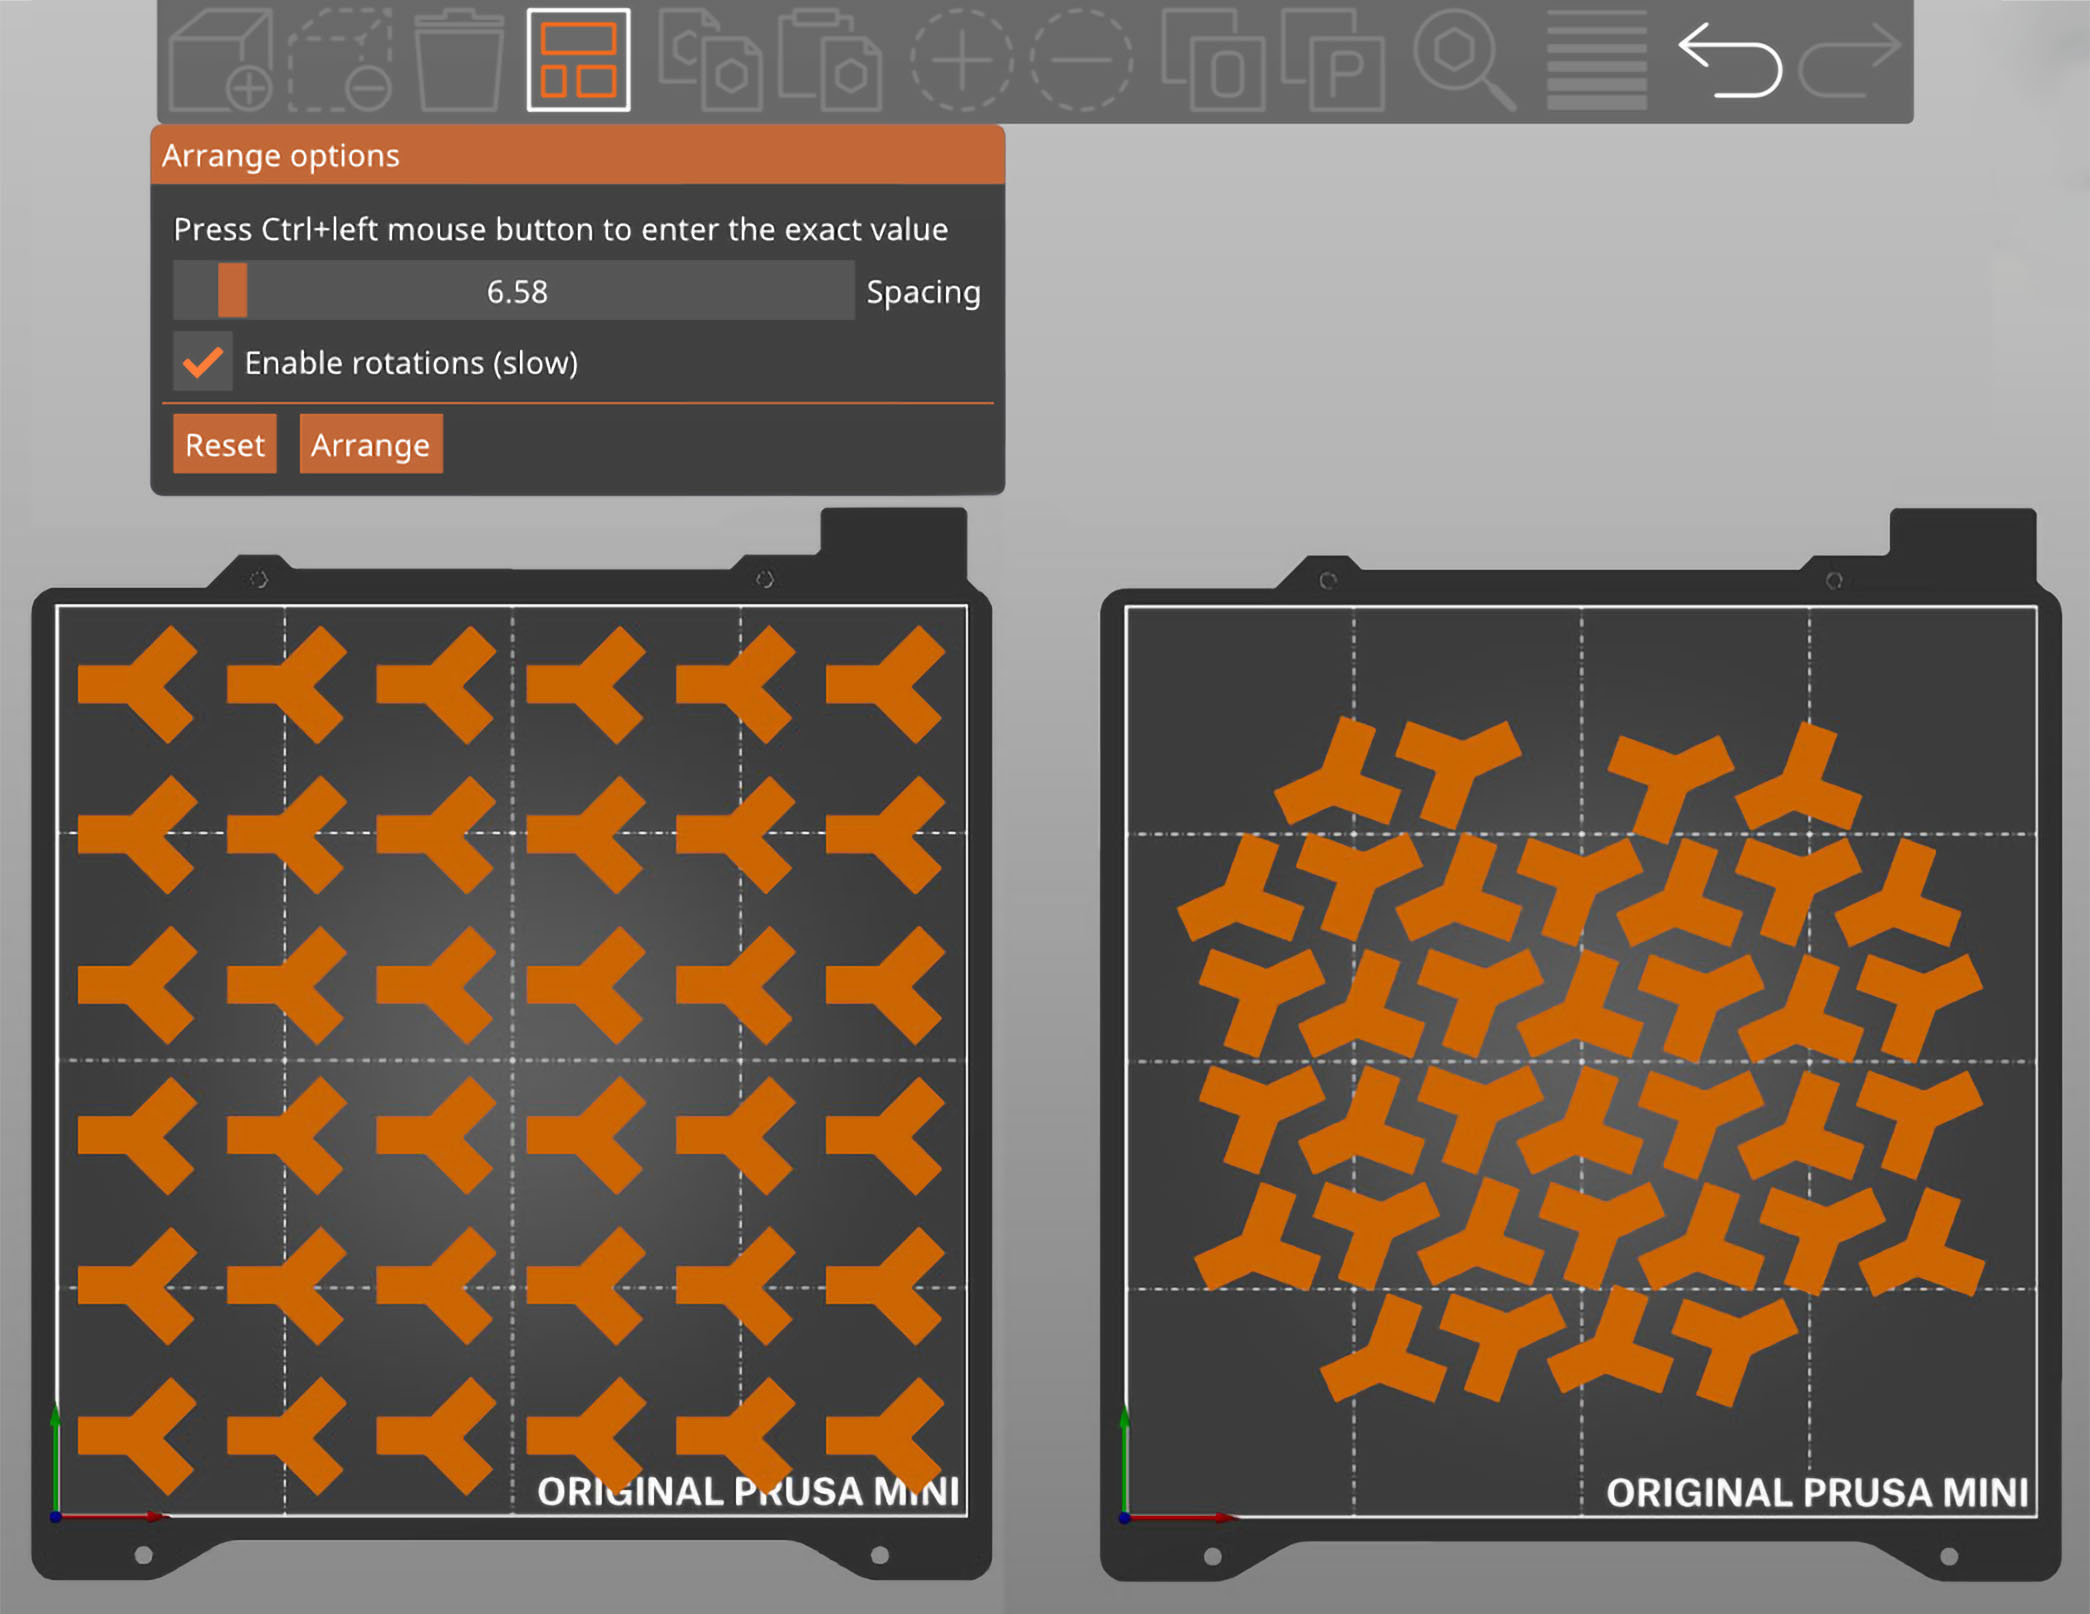
Customizable gap and automatic rotation

Starting with PrusaSlicer 2.3, right-clicking the Auto-arrange icon in the top toolbar opens a dialog to tune the distance between objects and to allow rotation of objects around their Z-axis during the arrangement. As a result, you’ll be able to fit more parts on the build plate.

You can either use the slider to set the spacing or enter an exact value by Ctrl+Left mouse button clicking into the text field.

The current spacing and rotation settings also affect the Fill bed with instances function.


8 comments

Log in  to post a comment
IcyMidnight
Tried out auto arrange today, but when I went to generate the G-code with supports the prints overlapped. Is there a way to make the auto arranger aware of what supports are going to be generated, or even better to get the supports to take advantage of nearby other objects?
Sean Kane
Starting with PrusaSlicer 2.3, right-clicking the Auto-arrange icon in the top toolbar opens a dialog to tune the distance between objects and to allow rotation of objects around their Z-axis during the arrangement. As a result, you’ll be able to fit more parts on the build plate.
Rafael
Arrange in the XL is using a small section of the plate. It is pushing instances outside of the plate when there remeins plenty of space.
wolffaayyy
I've noticed that when using the Prusa XL it snaps the object to the front left portion of the bed.  I assumed this is to optimize the number of bed sections that are heated. 
Is there a way to change this to the back left?  I prefer to print back there so that the side panels help block drafts and that is closer to where I have my camera mounted.
Rafael
I also prefer the back left. My printer is in a Garage and is often coulder than recommended, the back is better protected from airflow. This should be an option.
Davestation
right click on the arrange button
Excalibur2811
Surely there must be a way to align an object along the horizontal (X) axis? Using the mouse is not allowing micromovements enough for me to do this manually! If I have an object that is basically set at a right angle then it obviously makes more sense to have it aligned along the X and Y axis, and yet getting it laid down like that is proving impossible.
Alos how can I lay the plater back completely flat? The mouse just moves it in huge steps. Please do consider providing a "Set plater to flat" button.. 
Giuliano - Official Prusa CS
Hello. There is no option to align the instances automatically along X or Y axis. The automatic arrangement is made so that the printing area utilized is optimized.
Henry
Is there an 'Alignment' option? Printing a series of objects along the X-Axis will be more efficient than if they are lined up along the Y (move the head, not the whole bed), but I can't find any place to 'ALIGN" objects.
Giuliano - Official Prusa CS
Hello. There's an option to arrange the spacing, but not an alignment option.
360
edit: dupe post, pls delete
360
I'm with Henry.. an alignment feature would be great, if not a given ?