The nozzle tool remains attached to the print head after a tool change or print completion. The printer is unable to pick up or switch to another tool, and tool change operations may repeat or fail. Clicking sounds may be heard from the print head during parking attempts, but the tool does not release.
How to unlock the nozzle tool
Before you begin, remove the steel sheet and place an empty cardboard box on the heatbed (e.g. Prusament box) to protect it from accidental damage.
At first, skip the red-colored parts. In case the process does not work, repeat it including the red-colored steps.
Required tools:
- Small flathead screwdriver with a thin shaft
- 2.5mm Allen key
- Strong magnet, for example one from this set of neodymium magnets.
The manual release access hole is located behind the print fan assembly.
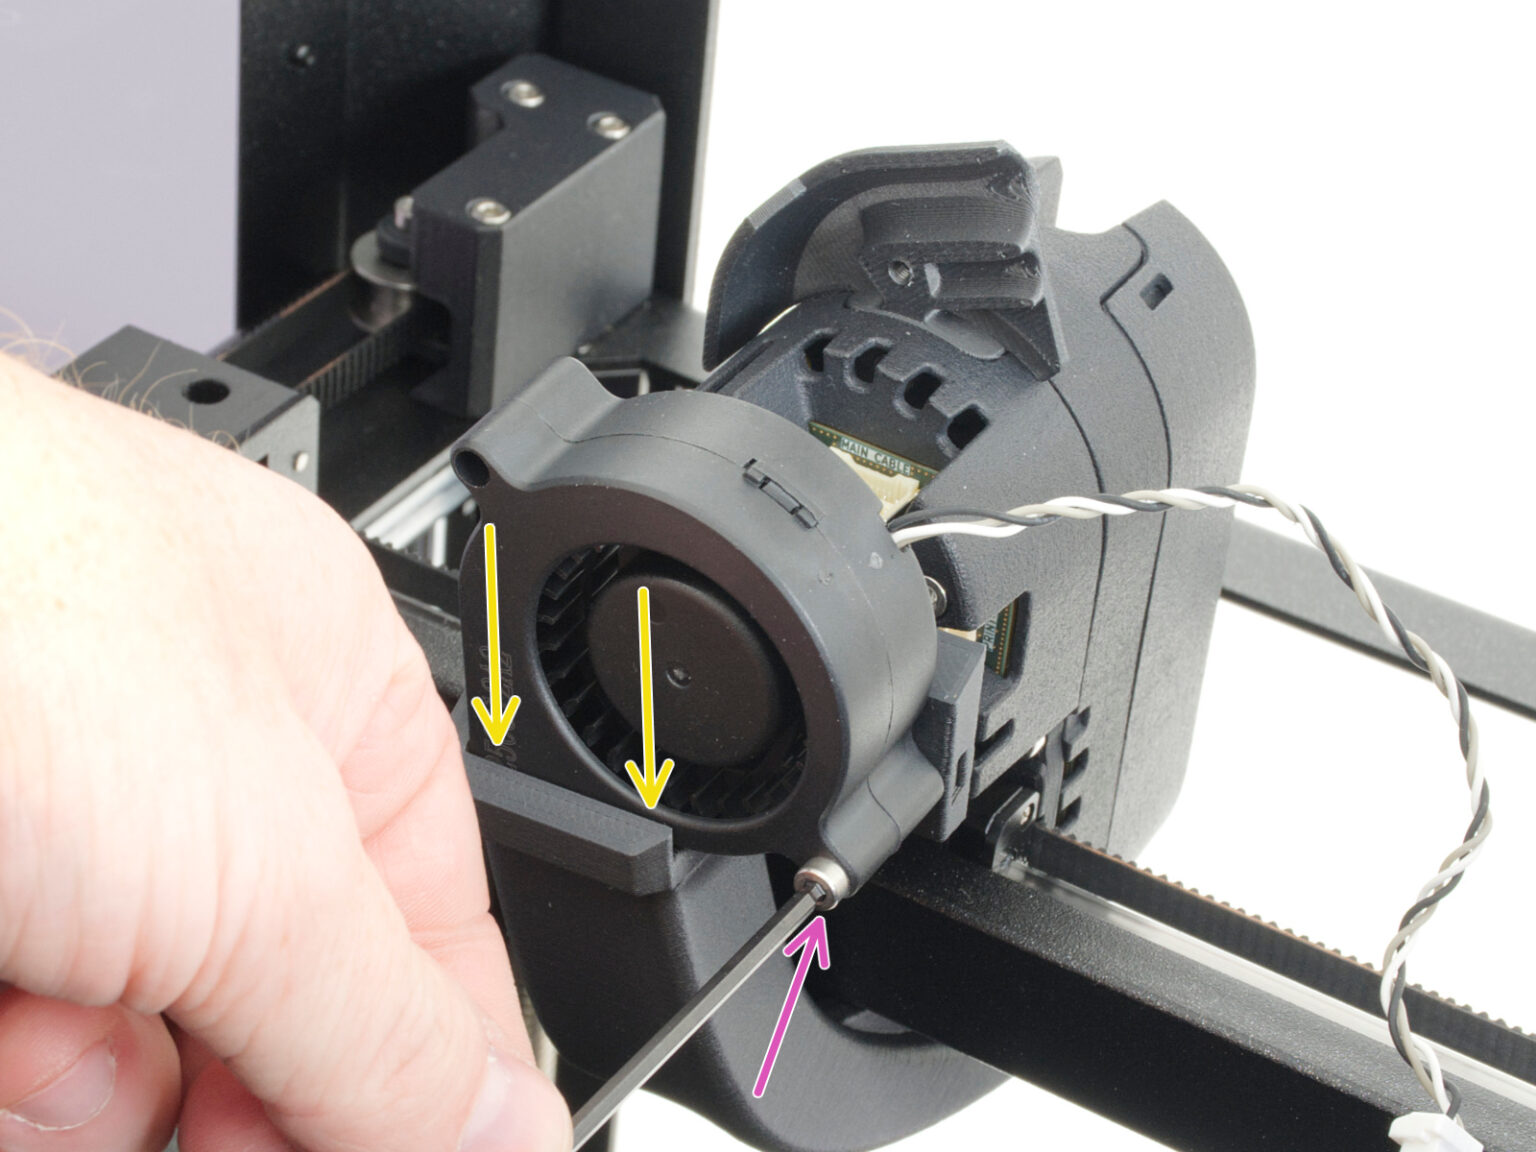
- Loosen the print fan mounting screw and carefully remove the fan from the fan shroud.
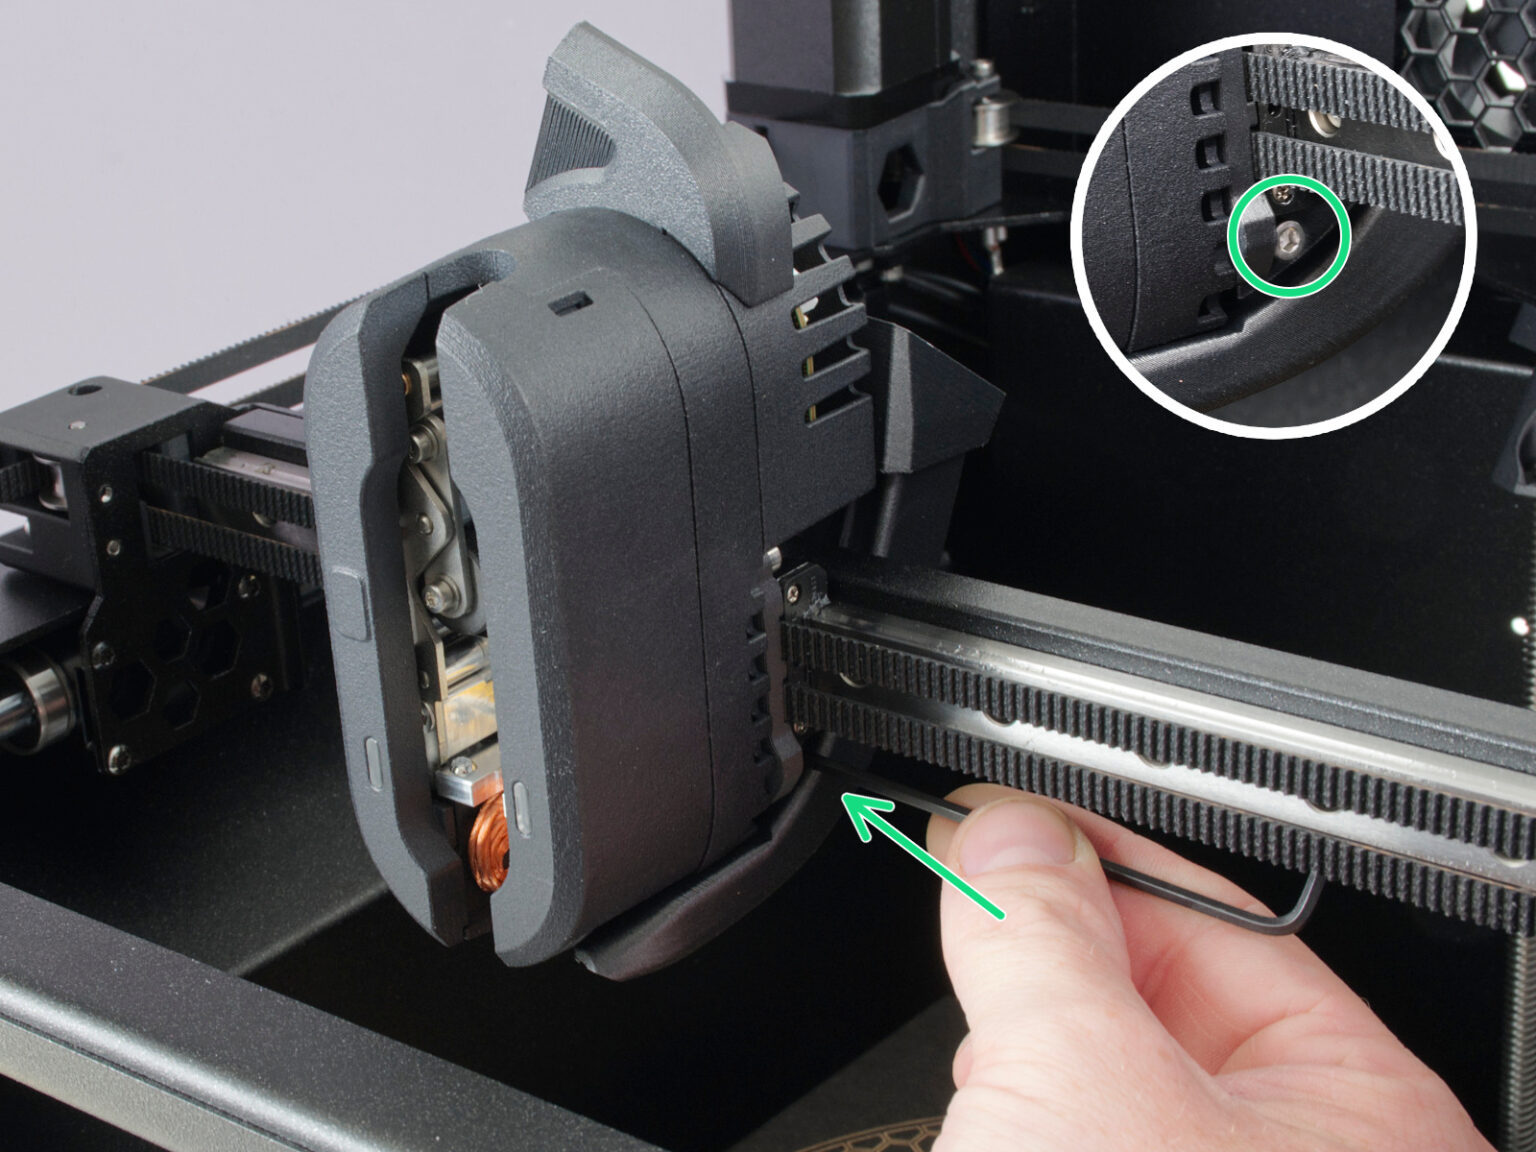
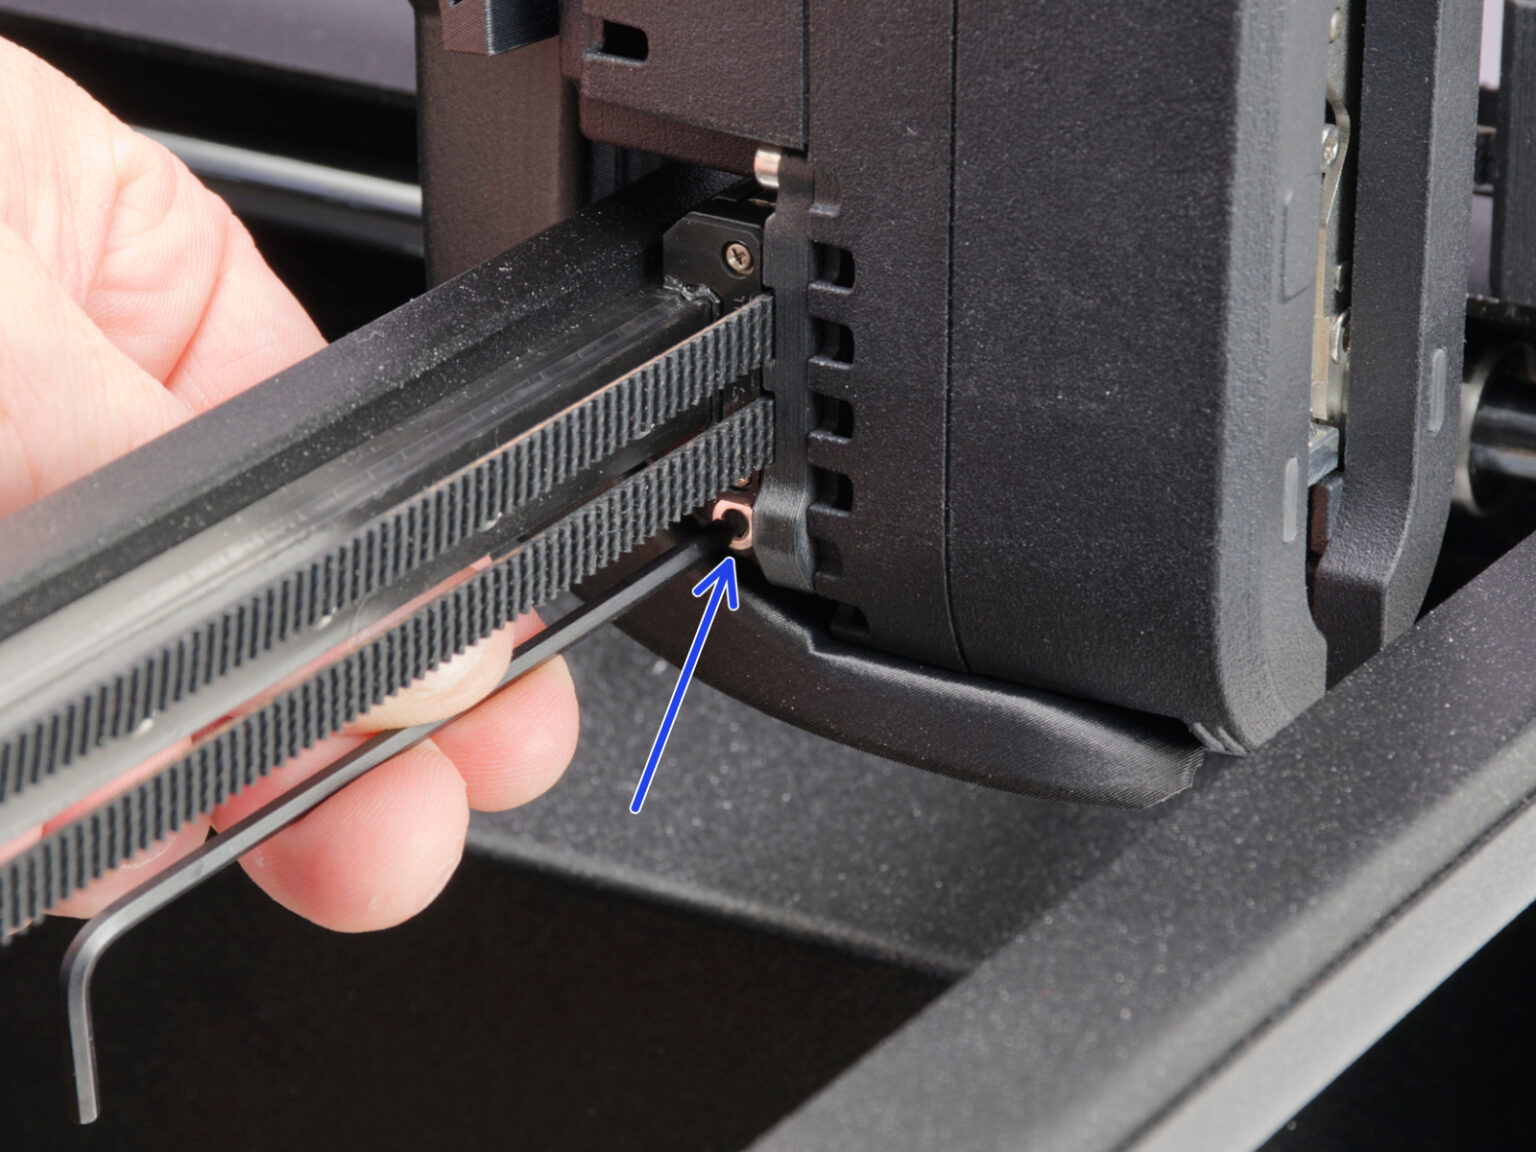
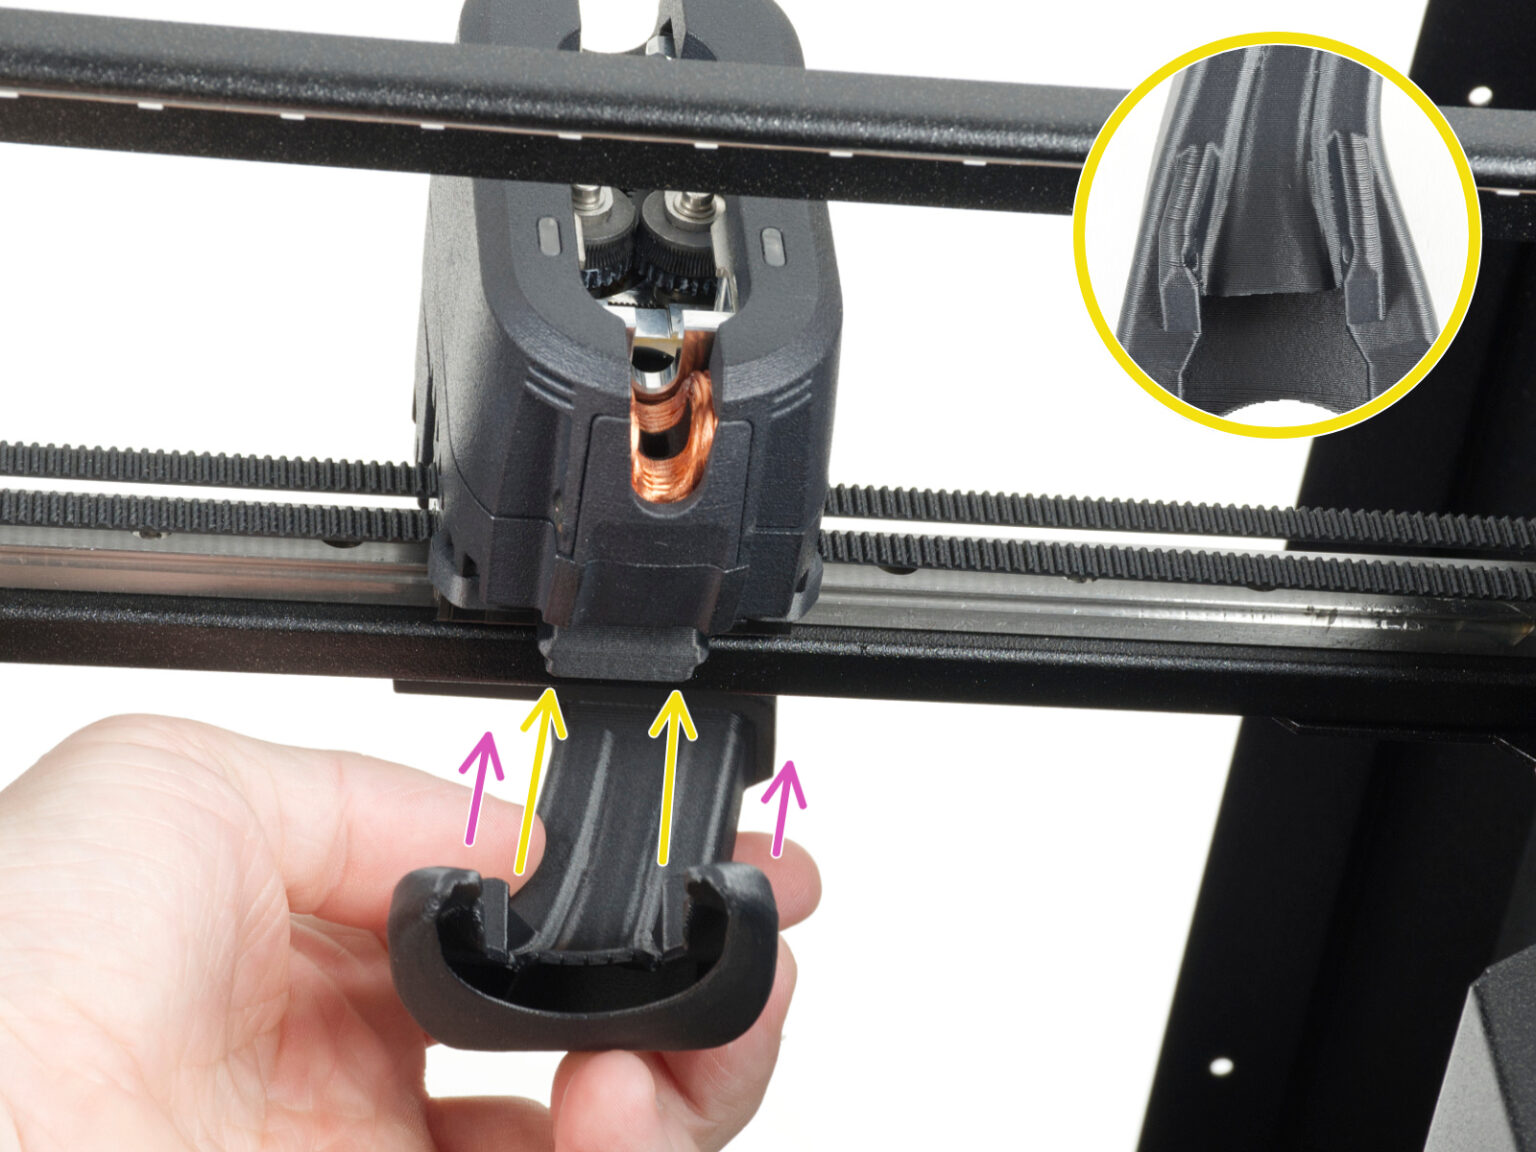
- Loosen the two screws securing the fan shroud on both sides of the print head, then remove the fan shroud from the printer.
- Attempt moving the print head to the dock position.
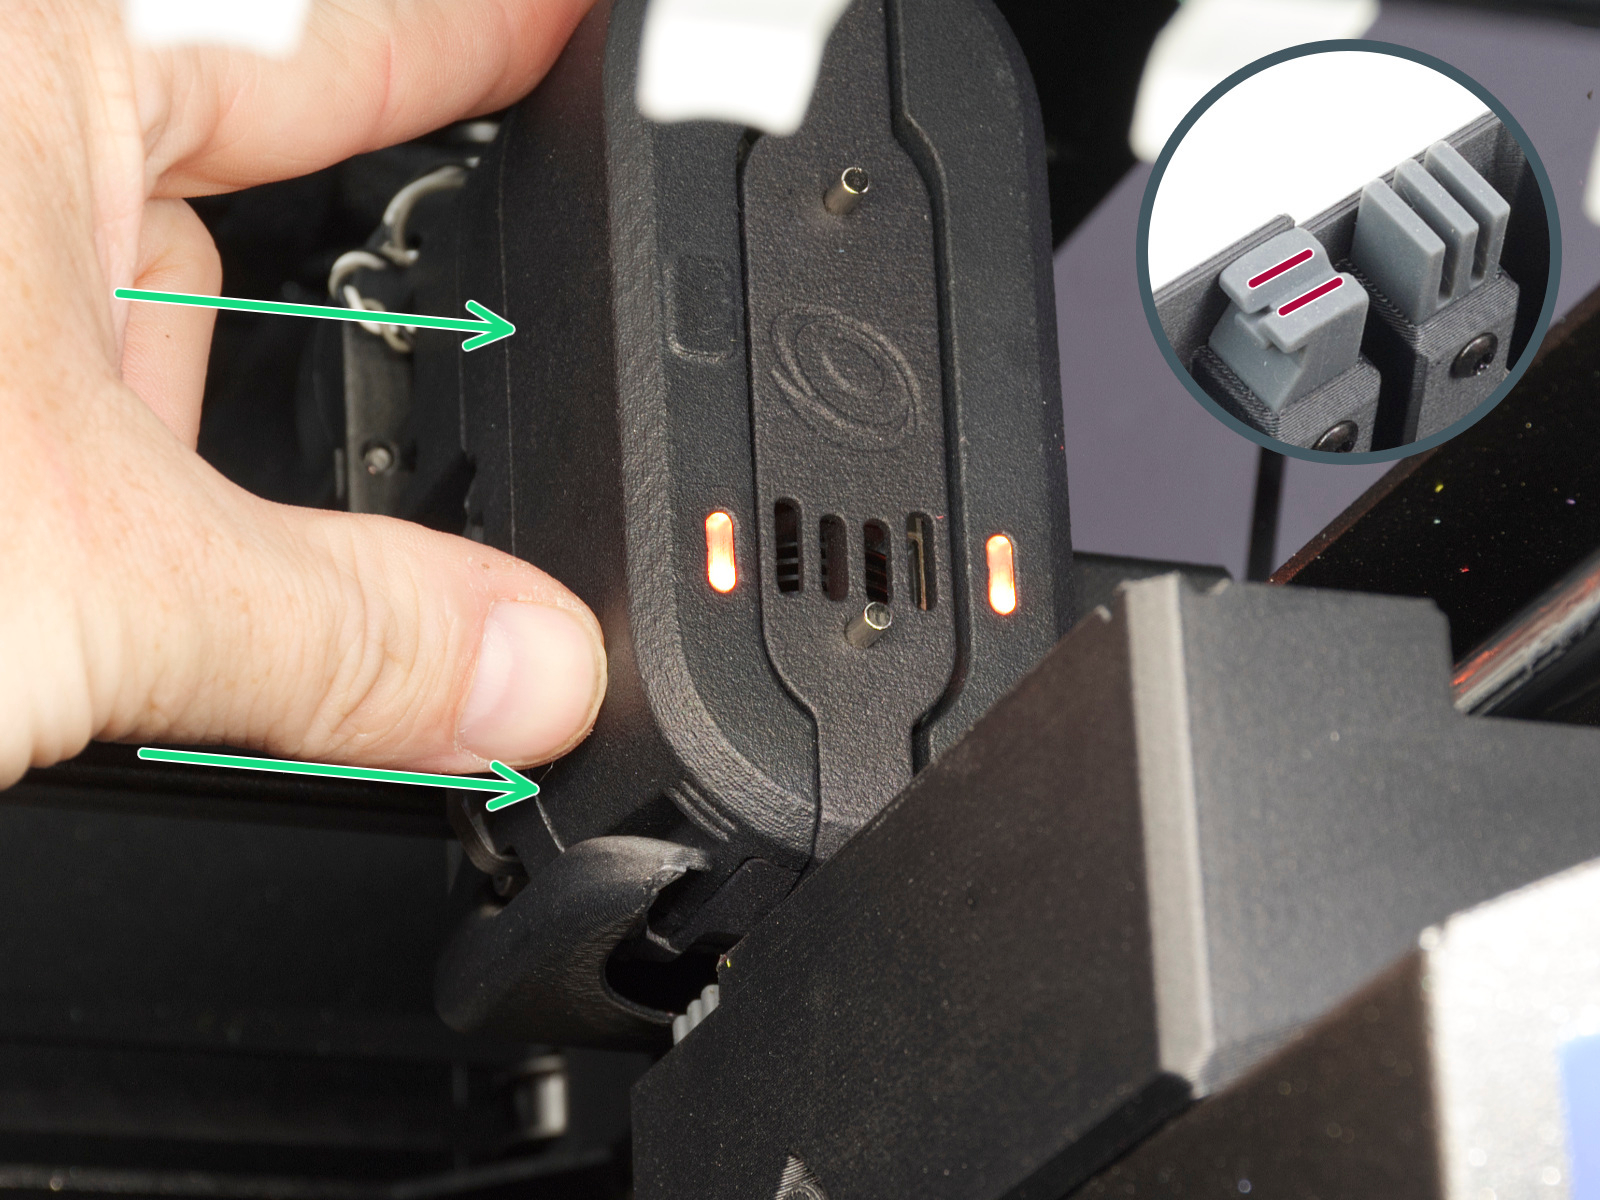
- If the previous step was not enough to release the print head, place a magnet onto front notch, where the magnet from dock engages the gate.
- Locate the access hole behind the print fan.
- Insert the flathead screwdriver into the hole until it engages with the internal mechanism.
Clicking sounds usually indicate that the mechanism is being actuated. The release mechanism only activates when the printer detects the nozzle tool in the dock position. Move the print head close to the appropriate dock so the nozzle tool is aligned with it.
- Carefully rotate the screwdriver while keeping the nozzle tool aligned with the dock. This should disengage the mechanism.
Once the locking mechanism disengages, the nozzle tool should remain in the dock.
After manually releasing the tool:
- Make sure the nozzle tool is fully seated in the dock.
- Check whether the mechanism of the print head is clean without any bits or filament residue.
- Check that the print head can move freely away from the dock.
- Restart the printer.
- Perform dock or tool calibration if requested.
- Reassemble the print fan shroud, and print fan, following the steps from the assembly guide.
If the nozzle tools still cannot be released
If the tool remains attached after following the procedure above:
- Inspect the dock area for debris or damaged parts.
- Verify that the nozzle tool is correctly aligned with the dock.
- Repeat the procedure while ensuring the tool is positioned near the dock magnet.
- Repeat the procedure once more, this time including the red-colored steps.
- Perform the required dock or tool calibration.
If the problem persists, contact customer support.