日本語

1. Tools necessary for this chapter
Step 1 of 82 (Chapter 2 of 4)
内容
コメント
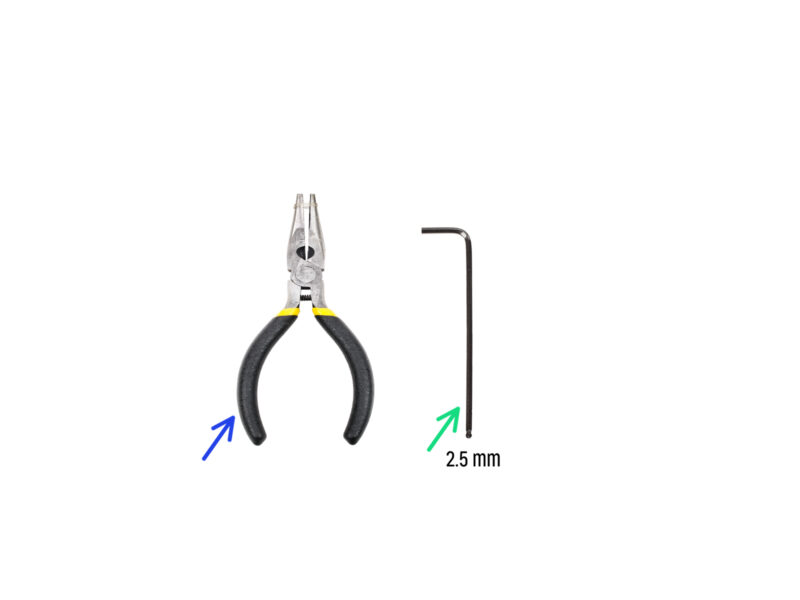
⬢For this chapter, please prepare:
⬢Needle-nose pliers for mechanical lock add-on only
⬢2.5 mm 六角レンチ
内容
Original Prusa MINI Enclosure (1.0)
- 1. はじめに
- 2. Assembling the Enclosure [進行中の翻訳]
- Tools necessary for this chapter
- Base & feet: parts preparation
- フットブラケットの準備
- Attaching the anti-vibration pads
- フットブラケットの取り付け
- Mounting the foot-brackets
- Anti-slip dampers: parts preparation
- Preparing the anti-slip dampers
- Mounting the anti-slip dampers
- Profiles: parts preparation
- Installing the profiles
- Top panel: parts preparation
- Fire Suppression System (add-on): parts preparation
- Preparing the Fire suppression system tube (add-on)
- Attaching the Fire suppression system tube (add-on)
- Securing the Fire suppression system tube (add-on): right side
- Securing the Fire suppression system tube (add-on): left side
- Installing the top panel
- Preparing the top window panel
- Mounting the top window panel
- MINI Back panel: parts preparation
- Installing the back panel
- Advanced filtration system (add-on): parts preparation
- Assembling the filtration: parts preparation (add-on)
- Assembling the filtration (add-on)
- Assembling the filtration (add-on)
- Assembling the filtration (add-on)
- Installing the blower (add-on)
- Inserting the HEPA filter (add-on)
- Inserting the HEPA filter (add-on)
- Installing the filtration (add-on)
- Side panels: parts preparation
- Installing the side panel
- Transport handle (optional): parts preparation
- Installing the transport handle (optional)
- Mounting the transport handle (optional)
- White LED strip (add-on): parts preparation
- Assembling the LED strip (add-on)
- Assembling the LED strip (add-on)
- Mounting the LED strip (add-on)
- LED cable: parts preparation (add-on)
- Guiding the LED cable (add-on)
- Guiding the filtration cable: parts preparation (add-on)
- Guiding the add-on cables: filtration cable (add-on)
- USB cable: parts preparation
- Inserting the USB cable
- PSU: parts preparation (add-on)
- Guiding the PSU cable (add-on)
- Releasing the front foot (add-on)
- Securing the PSU cable (add-on)
- Printer PSU preparing
- Inserting the printer PSU cable
- Securing the printer PSU cable
- Basic Board: parts preparation (add-on)
- Installing the Basic Board (add-on)
- Installing the Basic Board (add-on)
- Assembling the Basic Board (add-on)
- Mounting the Basic Board (add-on)
- Connecting the Basic Board (add-on)
- PSU holder clarification (optional)
- PSU holder: parts preparation (optional)
- PSU holder nut preparation (optional)
- PSU holder preparation (optional)
- Attaching the PSU holder (optional)
- Securing the PSUs (optional)
- Door hinges: parts preparation
- Assembling the hinges
- Mounting the hinges
- Mechanical lock (add-on): parts preparation
- Assembling the lock insert (add-on): parts preparation
- Assembling the lock housing (add-on)
- Securing the lock housing (add-on)
- Assembling the lock mechanism (add-on): parts preparation
- Assembling the lock mechanism (add-on)
- Securing the lock mechanism (add-on)
- Installing the door panel (add-on): parts preparation
- Installing the door panel (add-on)
- Door assembly: parts preparation
- Installing the door panel
- Assembling the door handle
- Haribo休憩タイムです!
- グッジョブ!
- 3. Installing the printer
- Manual changelog MINI Enclosure
コメント
ログイン してコメントを投稿する
コメントなし