This will be covered more extensively in the near future, but for now, we want to give you a quick overview on how to use some of the amazing new features available in PrusaSlicer. This guide sums up using primitives (cubes, spheres, cylinders, etc.) to affect selected regions of your 3d-model in different ways, be it various infill, perimeters, or custom supports.
Modifier meshes
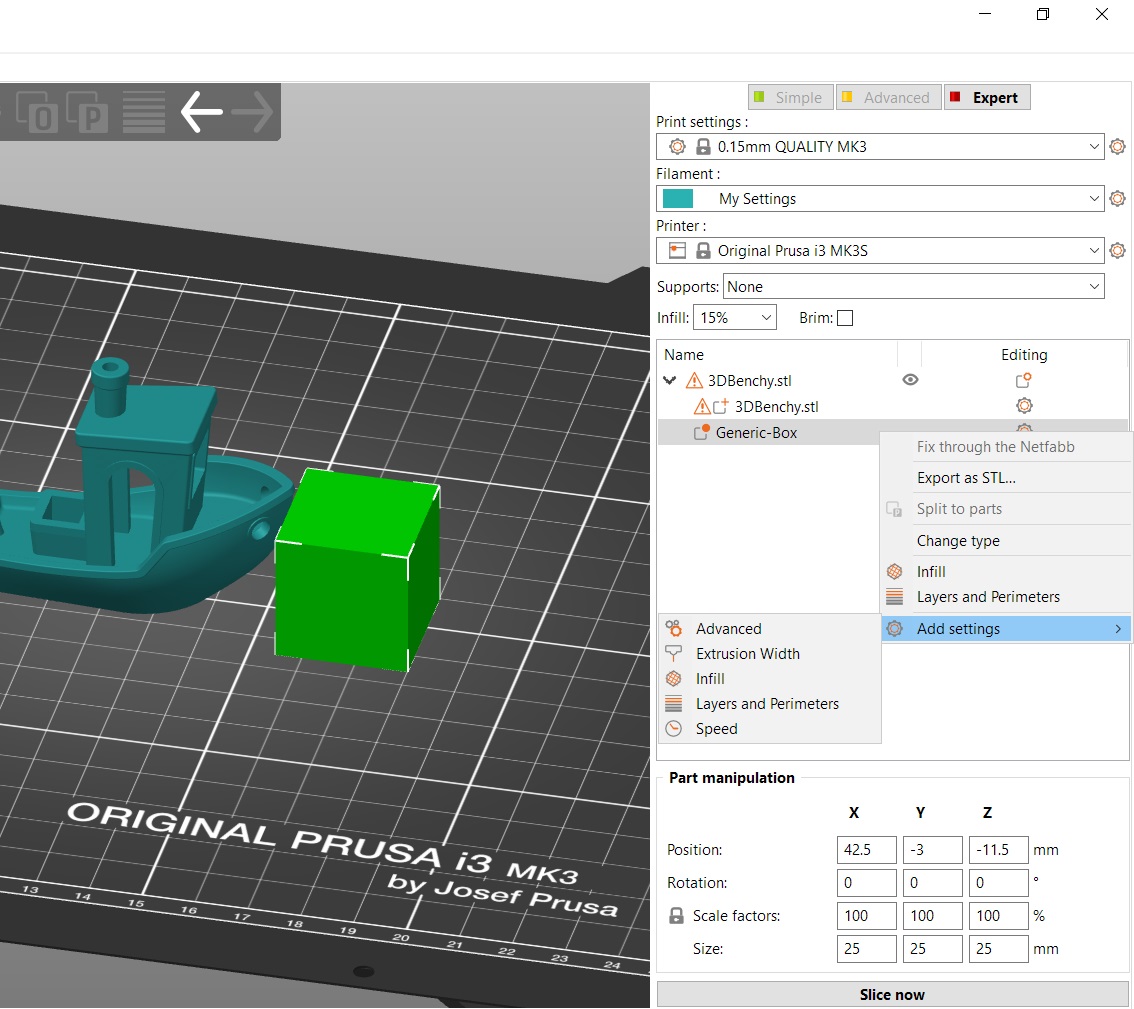
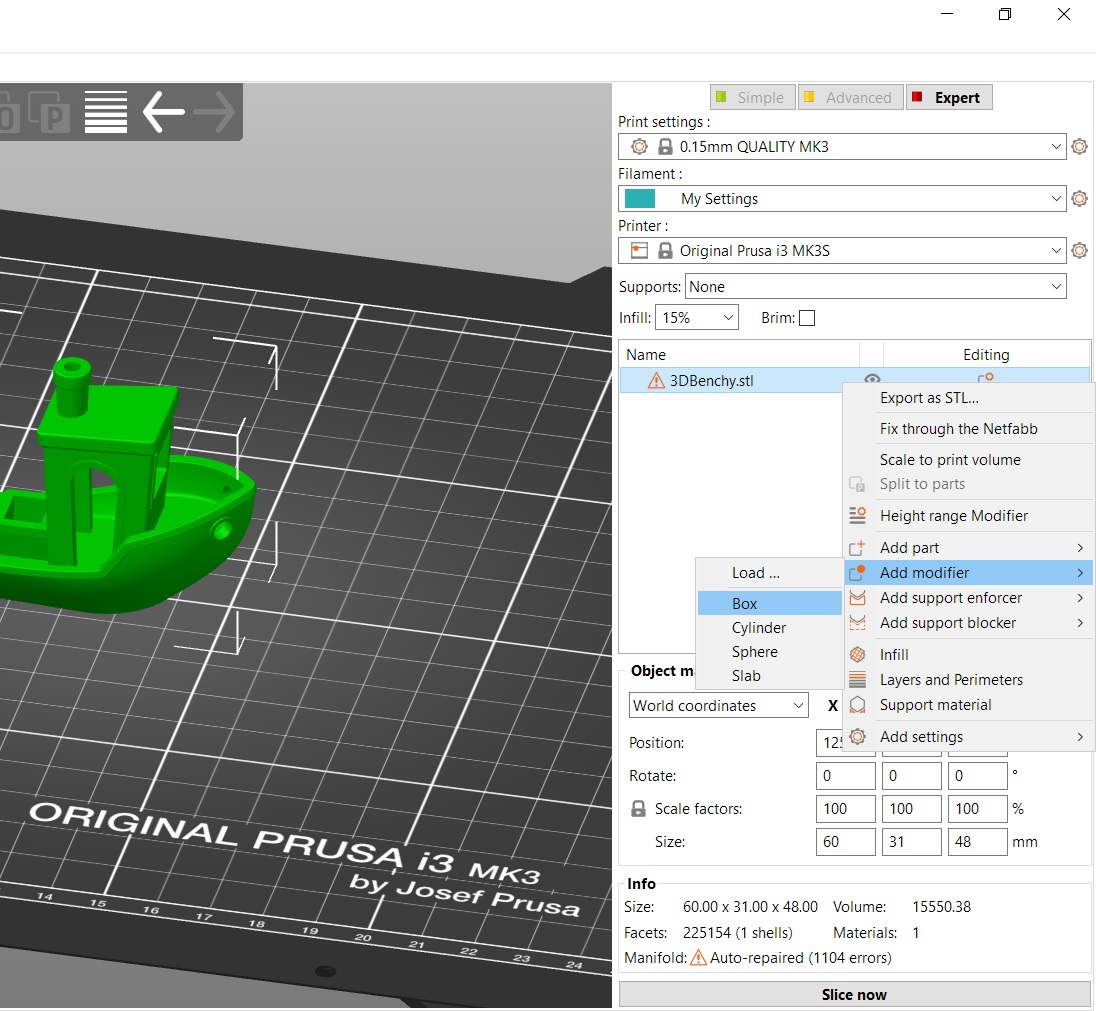
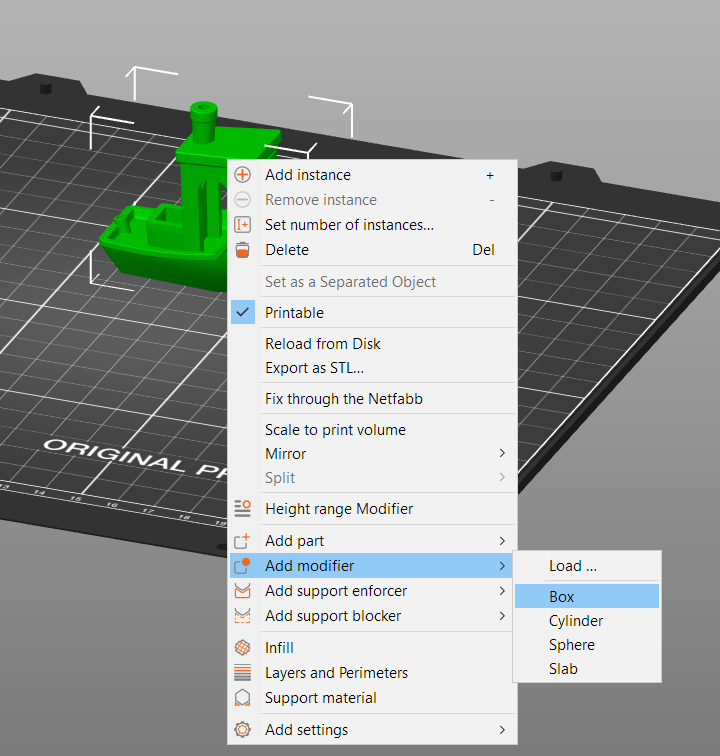
Right-click on a model and pick Add modifier - [Select modifier type]. When you pick the modifier shape (e.g. cube) it will appear in the 3D view and in the Object list in the right panel.
|
|
|
You can either right-click on the modifier in the 3D view or click on the gear icon in the Object list panel to generate modifier-meshes.
There are 4 primitives to choose from - Cube, Cylinder, Sphere, and Slab. Additionally, in the expert mode, you can use any STL-file as a modifier-mesh by selecting Load … in the mesh selection. This mesh is typically something you’ve modeled beforehand in a 3D-modelling program.
Custom supports
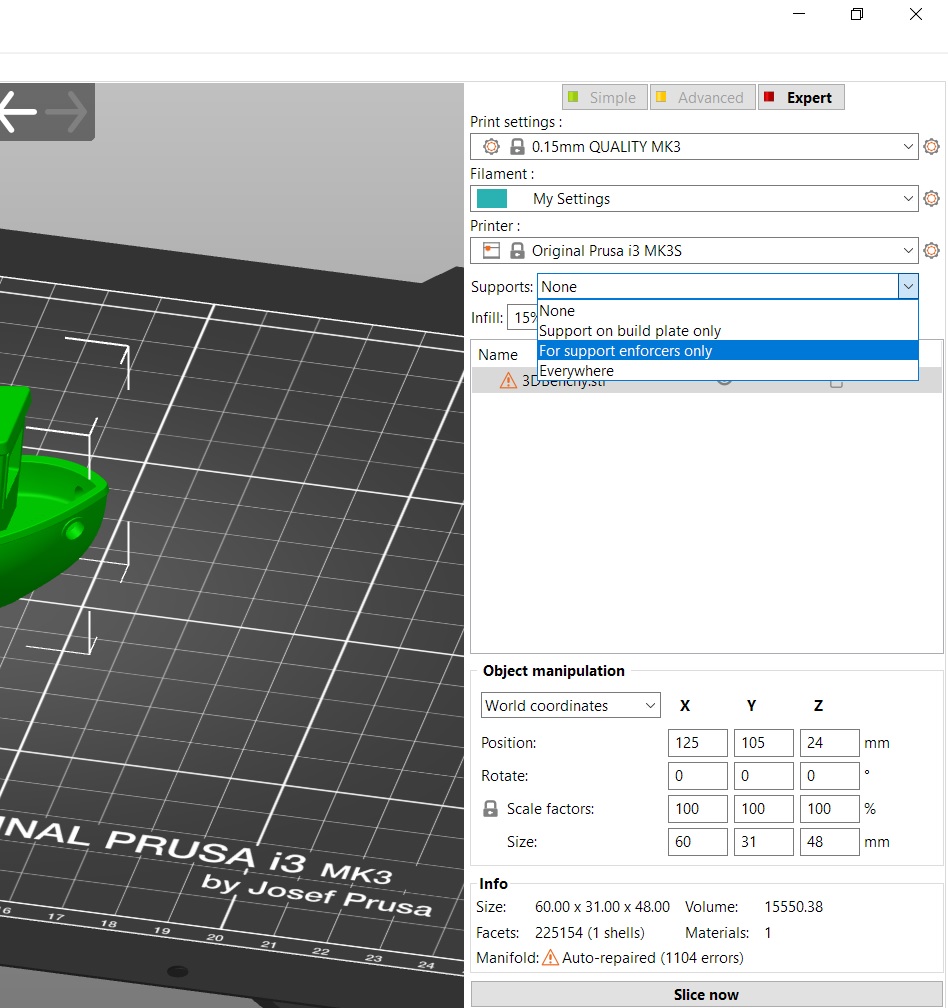
Using custom supports is the same approach as modifier-meshes, where you instead choose "Add Support enforcers" for applying supports and "Add Support Blockers" to remove supports in certain areas. Supports will be generated to where the Enforcer intersects with the main model. Be sure to enable support enforcers, in the drop-down menu found above your list of models.
Height range modifier
Right-click on a model and pick the Height range modifier from the same context menu you added the modifier-mesh or Support enforcer/blocker. A new window will appear in the right panel called Height ranges. Here you set intervals, between which you can apply different settings. When you set an interval, it will appear in the Object list in the right panel.
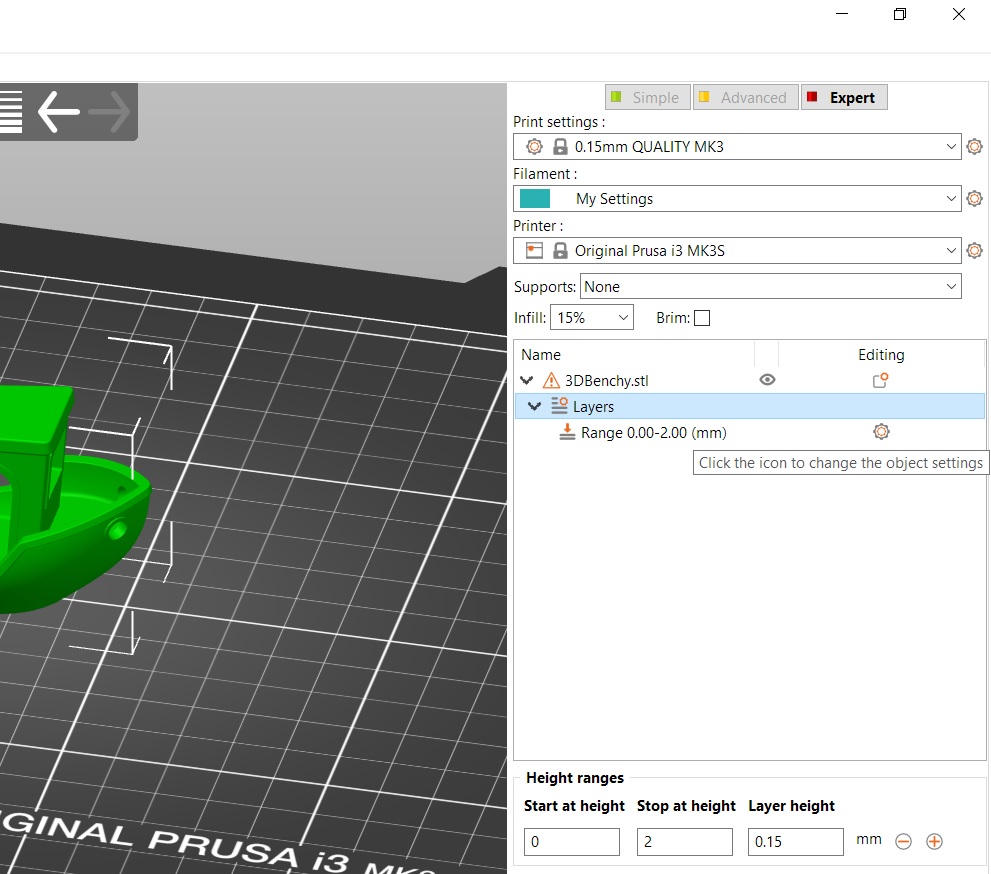

When you click on the gear icon next to the interval, you can choose to set up:
- Advanced mode - custom infill, layers, and perimeters or support material
- Expert mode - custom infill, layers and perimeters, support material, extrusion width, speed, and several other settings
The interval setting also features a layer height input. By default, the global layer-setting is used, but you can choose to slice the model at a different layer height and only the interval will be affected by this change. Keep in mind that if you set up a different layer height for the entire model, on the height interval it will be overridden by this value.
Modeling using PrusaSlicer
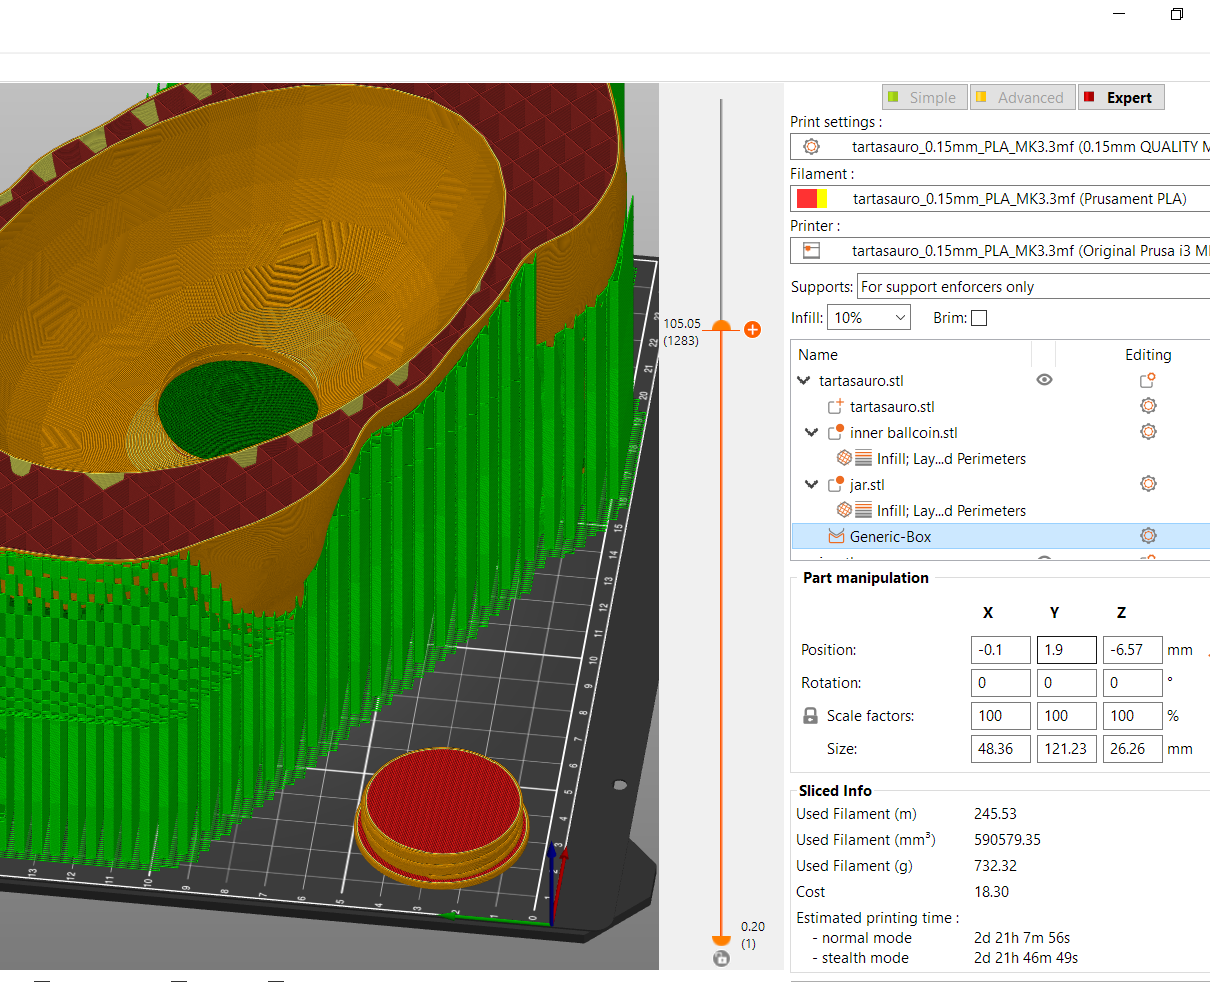
These features essentially enable you to do modeling/remixing using only PrusaSlicer. Below is an example where a Tartasauro, by Thingiverse-user 'gianpaolo', has been hollowed out and made into "Piggy-bank" using only the features explained here. The threading and screw-cap at the bottom are both the same model, found online. Void and coin-slot are primitives generated by PrusaSlicer, with infill, perimeters, and top/bottom-layers set to zero.
3 comments