English
Login

Text tool

Relevant for

MK3S+
PrusaSlicer
Article is also available in following languages
English
Čeština
Polski
Deutsch
Français
Español
Italiano
日本語

The Text tool lets you easily add labels, notes, signs, serial or version numbers to your models directly in PrusaSlicer. You can add text to any type of surface, not just planar faces, but even to curved surfaces. The text entities are fully editable even after re-opening a saved project file. 

Adding text to existing models

Select the target model and press the T key. Alternatively, you can right-click on the model and select Add part - Text, from the context menu.

Creating standalone text objects

Right-click the platter and select Add shape - Text. This will create a standalone object not connected to other objects in the project.

Text manipulation

You can manipulate the text by dragging it around the object and placing it in the desired position. When you're dragging the text object on the model, a white marker will appear, highlighting the position at which the surface normal is calculated.

You also have the option to rotate the text along the Z-axis (Z-rot) and elevate it along the Z-axis (Z-move).

Fonts

The text tool automatically import's the font library on your device. Any TrueType Font (TTF) should work correctly. If you install a new font on your device, you don't have to restart PrusaSlicer to be able to use it, simply close and open the text tool again and PrusaSlicer will load the newly added fonts.

Text presets

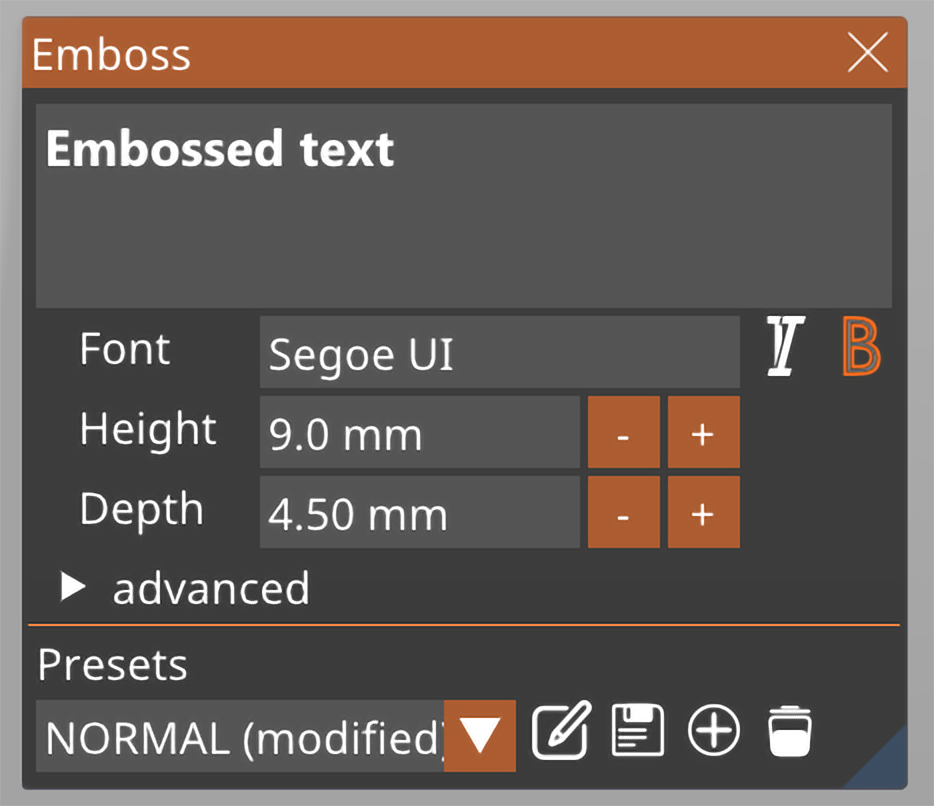
You can save and load text presets. These include all the text settings, such as the selected font, the text height, and depth, but also all of the advanced settings. Text presets are especially useful if you want to maintain a consistent text style when creating version numbers and similar labels.

Embossing, debossing and modifiers

In the Text tool context menu, you can select whether the text is to object:

  • Added - this creates a new part and embosses the text
  • Subtracted - this creates a negative volume, which debosses the text
  • Modifier - this creates a modifier

You can also switch between these object types later. Simply right-click the Text object in the Object list and select Change type from the context menu.

Text used as a modifier to turn on Fuzzy skin


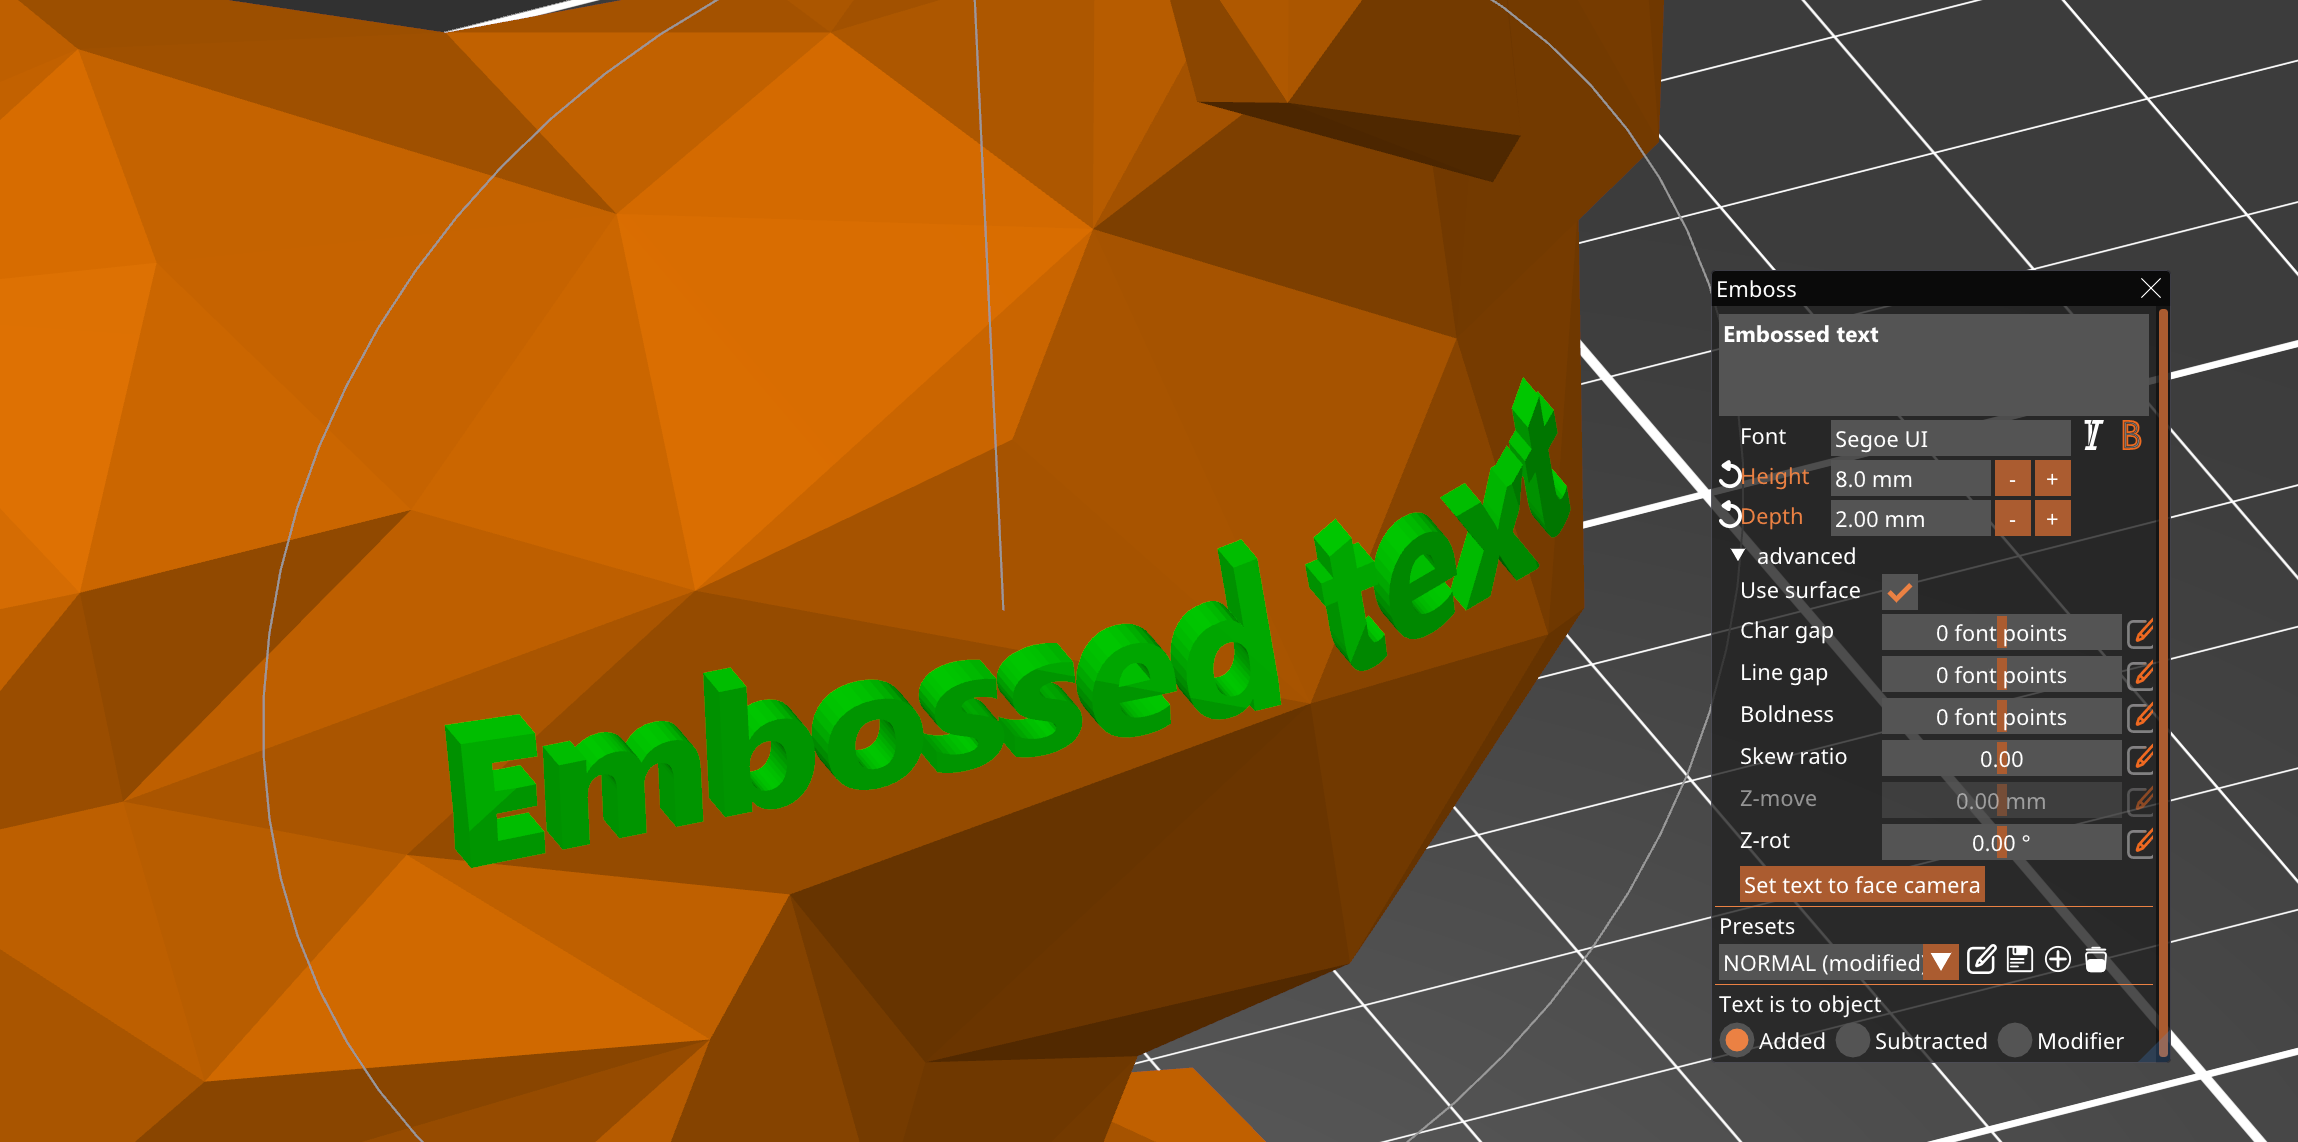
Make the text follow curved surfaces

If you expand the advanced text menu, you have the option to enable the Use surface option. The text will curve along the surface beneath it.

However, the limit is 90 degrees. As you approach this angle, the text will become more and more deformed.


Was this article helpful?
This action is available only to registered users. Please log-in.
 

27 comments

Log in  to post a comment
Steve
I'm also having issues with making the font flush with the surface I'm placing it on. Please fix this. I guess for now I'll just modify the part in Fusion 360, which is an extra step I'd rather not have to do. I was excited when I first found this function, but now I'm disappointed.
MagnusVesper
You can add the text as a modifier, then add the "extruder" setting to it. Then right click on the text in the list of objects on the right and select "Add Settings -> Extruders". Each filament slot on the MMU is considered an extruder here.
The text modifier object will have an extruder column in the object list that you can change like how you normally set the color of different objects. But that doesn't work here, you have to use the "Add Settings" method.
userprintly
If I right-click on the surface I want to place the font on then select "Add Modifier --> Text" it defaults to aligning the text with the surface. E.g. if I'm adding text to a 4-sided pyramid, then the text will align to whichever face I right click on when adding the modifier.
Fred
I have a Prusa XL 5 tool printer. The modify text option is inconsistent. I try to use it to indentify a model ID for printed models. I want the text flush with the bottom of the model in a different color used in the model. It works great sometimes but not a all other times. The model shows the text but when sliced the text is not shown or printed at times. I use both add modified - text or add part - text and than change text to modifier. The result is the same works sometimes and not others. Changing extruder has no impact and color has no impact. I'm at a loss on how to use this great feature reliably.
Fred
The modify text option is inconsistent. I try to use it to indentify a model ID for printed models. I want the text flush with the bottom of the model in a different color used in the model. It works great sometimes but not a all other times. The model shows the text but when sliced the text is not shown or printed at times. I use both add modified - text or add part - text and than change text to modifier. The result is the same works sometimes and not others. Changing extruder has no impact and color has no impact. I'm at a loss on how to use this great feature reliably.
Zukke
When I added a Text to my model, I can't modify the text itself anymore in the options menu. Only if I doubleclick the whole text I can replace it by rewriting it completely, but just delete one letter - not possible. Is that a bug?
thrasher
How can I programmatically change the text value when slicing the file? Similar to how custom gcode can be added, I would like to programmatically change the text modifier settings, to adjust the text value, but only when slicing.

Why? I'm trying to find a way to embed the slicing date, or the github "hash", of my model version, directly into the model when printed. I want to use this to track versions, iterations, and modifications that would be hard to understand on final parts.

The workflow I'd like is to call a script function that returns the text value to use in the modifier settings.

I'd prefer to do this with a python script (or any language) that is run when slicing, that would return the text value to use.

Example script signature called by Prusaslicer:
String getMyText(text_modifier_id) {
/* do something like return today's date, or fetch the git commit hashcode, or add my CC license with current year */
}

Thank you for any guidance on this!