The Prusa CORE One, and the Original Prusa MK4/S, MK3.9/S are equipped with a loadcell.
This component incorporated in the Nextruder heatsink detects if the nozzle is close enough to the steel sheet for printing.
The only adjustment needed for the loadcell is during the selftest. After that, the first layer calibration is always done automatically during the mesh bed leveling. This avoids any damage that would be caused by the nozzle digging into the steel sheet.
Below are our recommended steps for loadcell troubleshooting.
Testing the loadcell
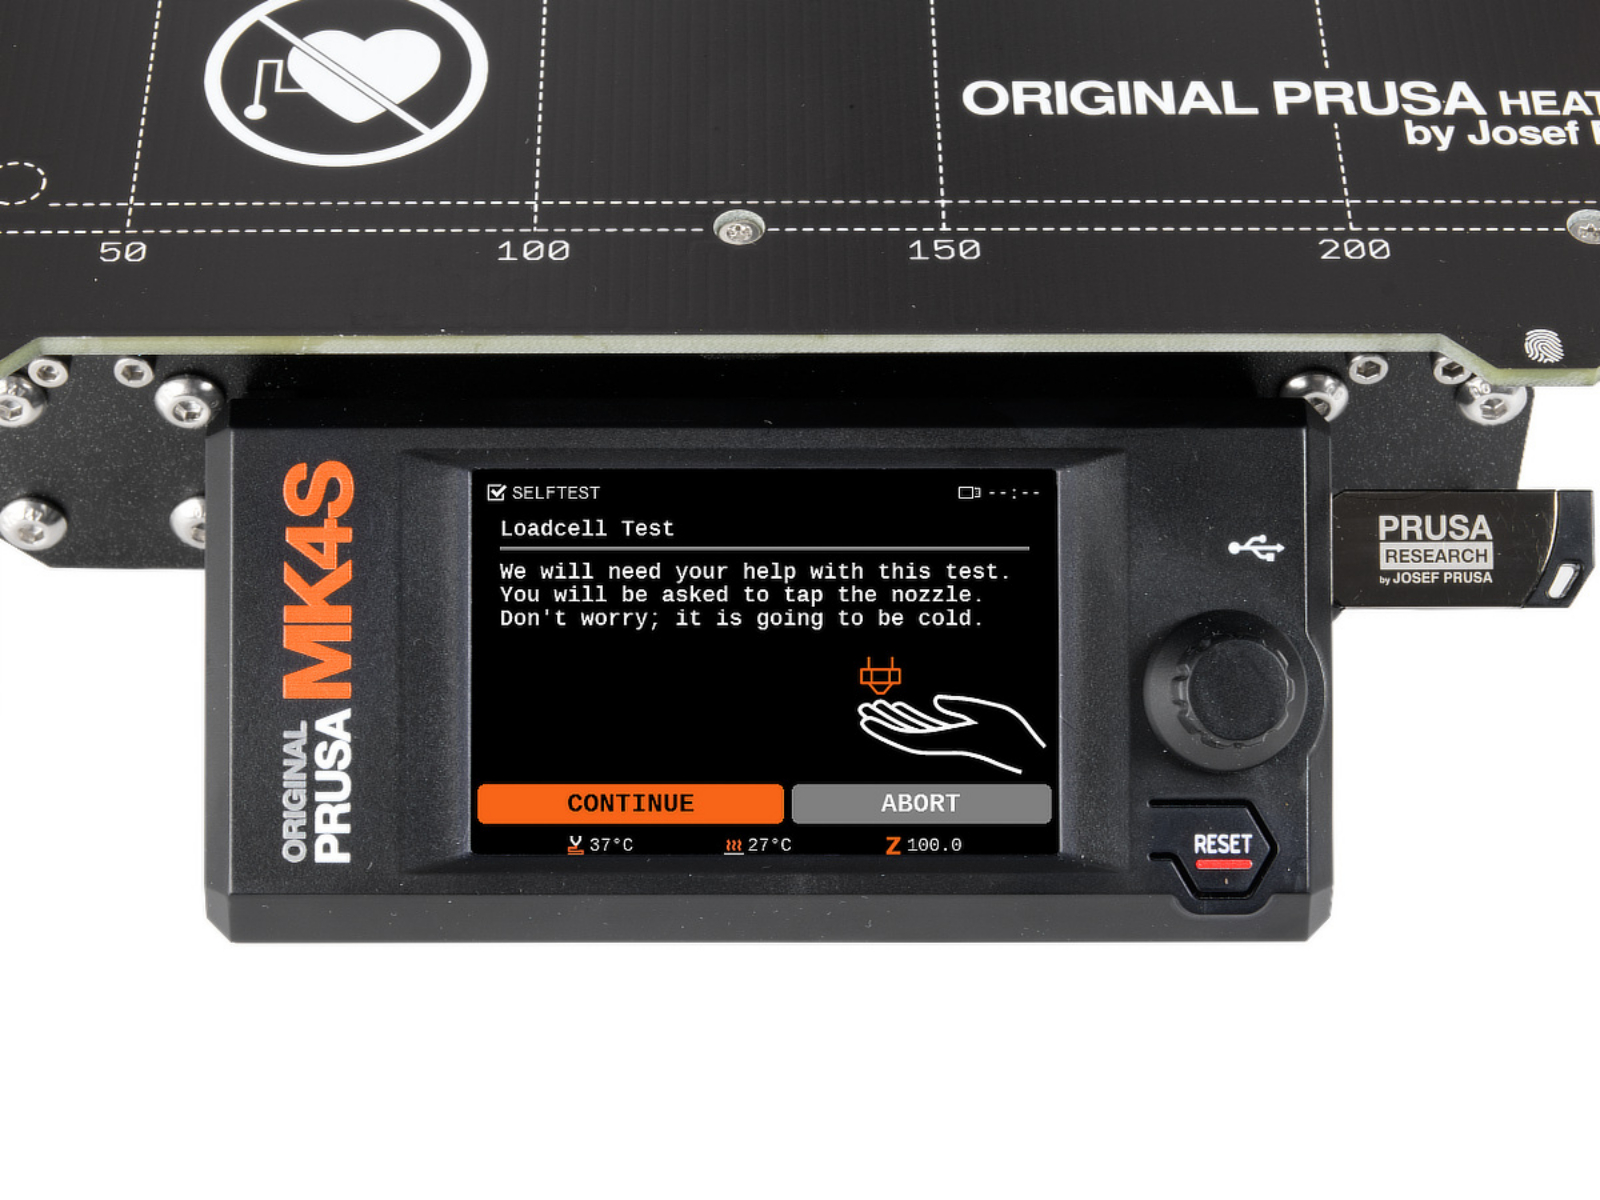
During the selftest, the loadcell is tested. The printer screen shows the instructions for testing it.
Alternatively, the loadcell testing can be initiated in LCD Menu -> Control -> Calibration & Tests -> Loadcell Test.
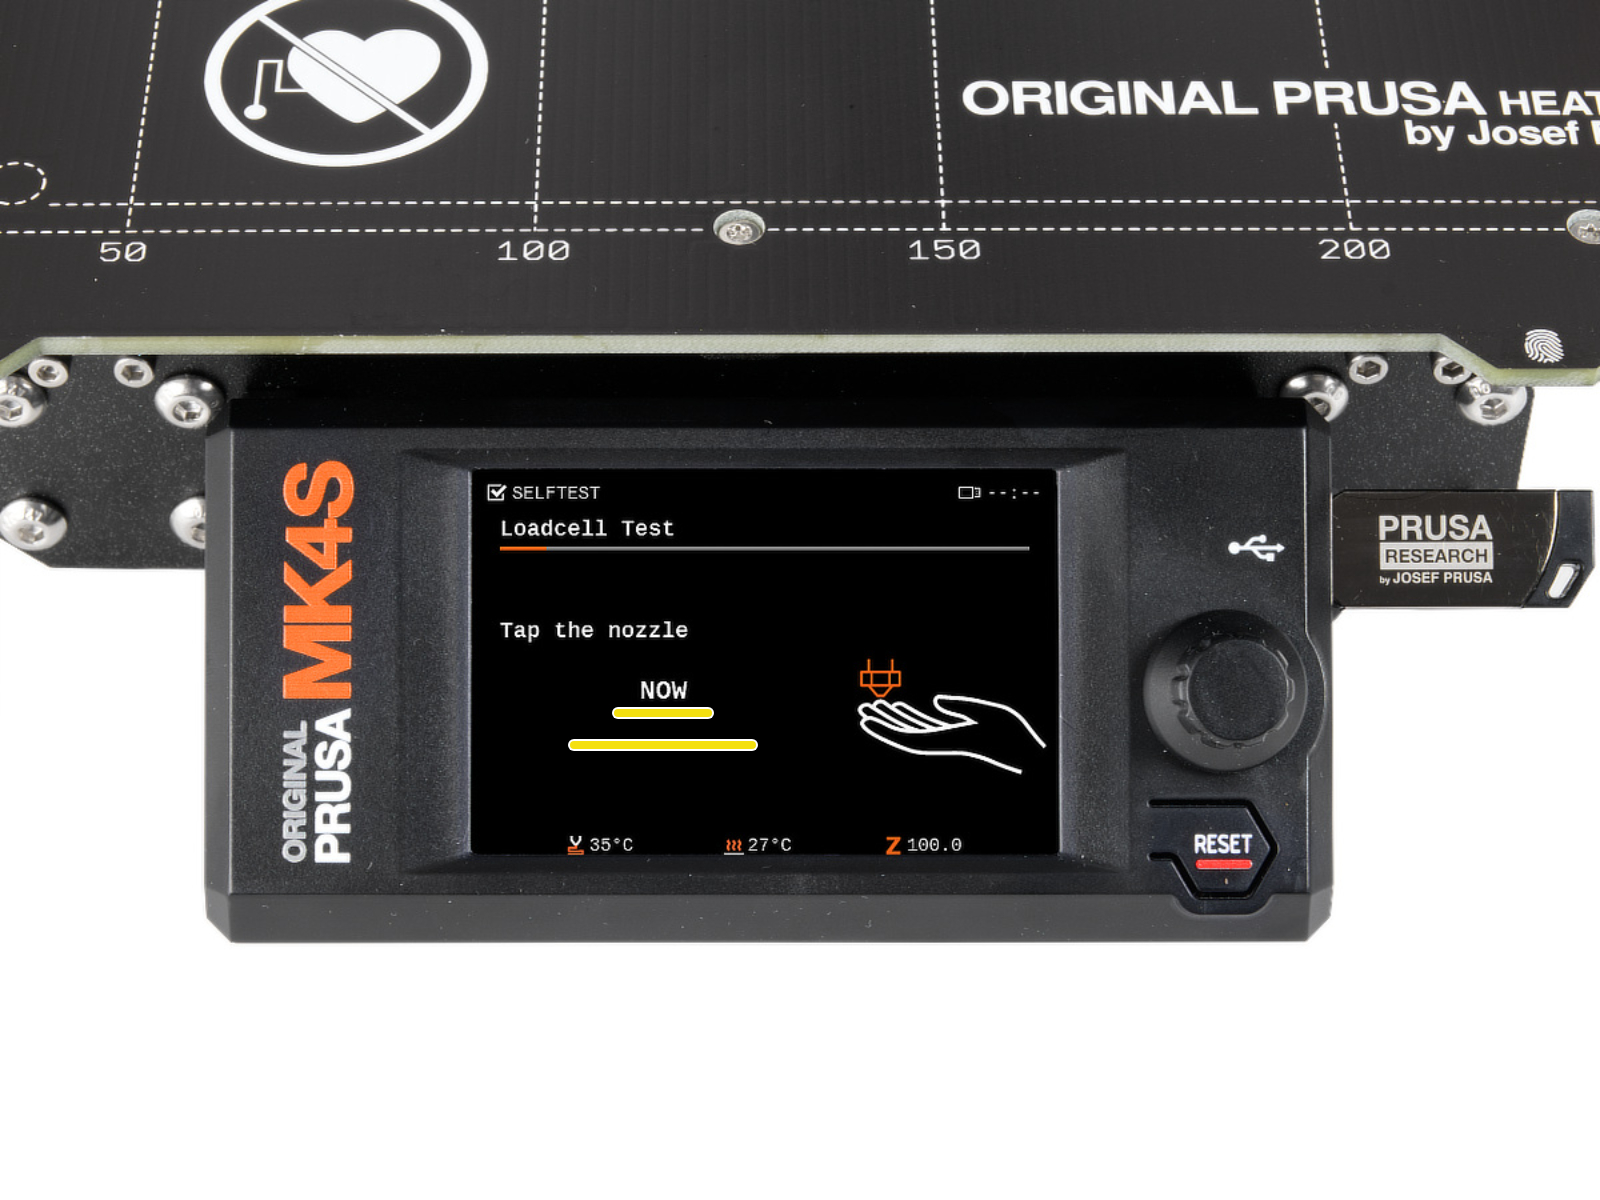
During the test, you will be asked to tap the nozzle at a specific time, and a progress bar shown on the screen is filled, depending on the pressure applied to the loadcell. Tapping of the nozzle can be done with a finger, as well as with a hard object.
If the bar is not filled, is filled irregularly, or the printer shows any errors, please contact our customer support.
 |  |
Bolts that interact with the loadcell
Some of the Nextruder bolts, if too tight, might generate extra forces that can be sensed by the loadcell, skewing its readings, hence potentially causing the issue.
Check if slightly loosening the following bolts, while having the parts still tight and secured in place, can solve the issue.
Preliminary steps (MK4S, MK3.9S)
On MK4S and MK3.9S, it is necessary to perform the following preliminary steps to access the hotend fan bolts.
- Rotate the fan-door-cover to open it completely.
 |  |
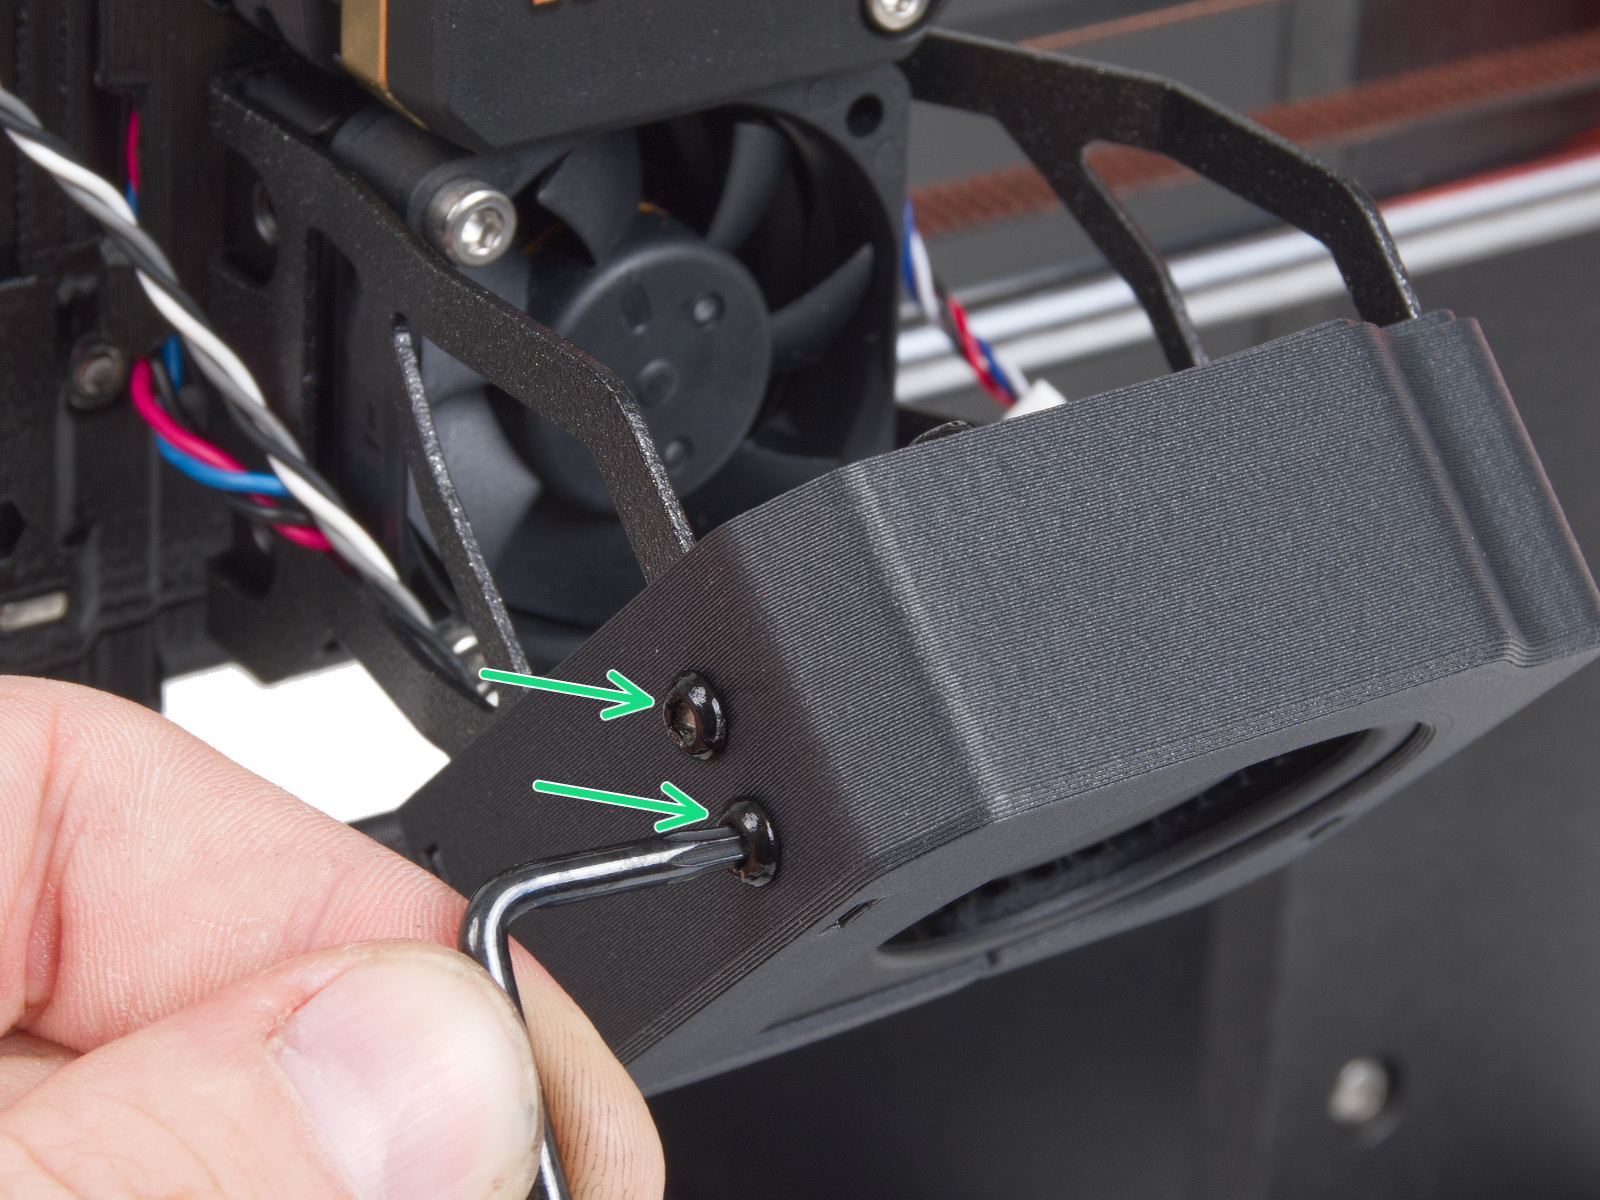
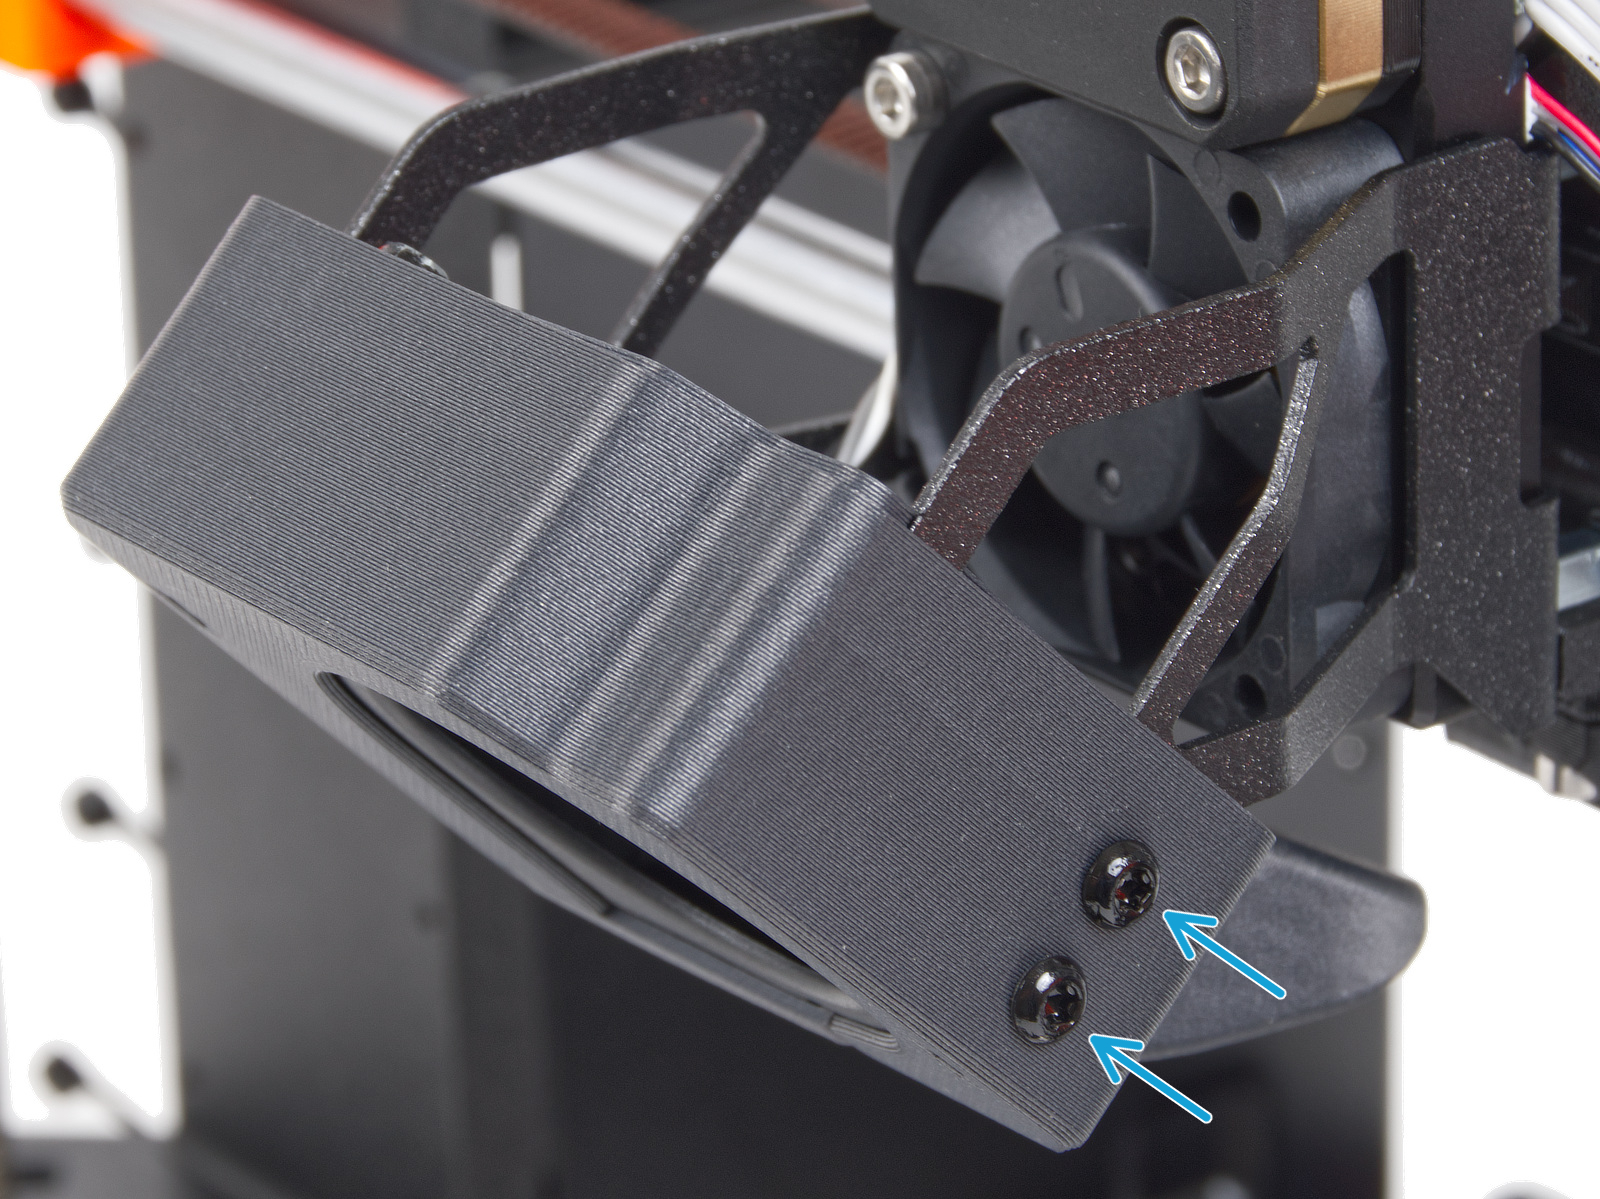
- Loosen 4x M3x5rT screws, two on the left and two on the right.
 |  |
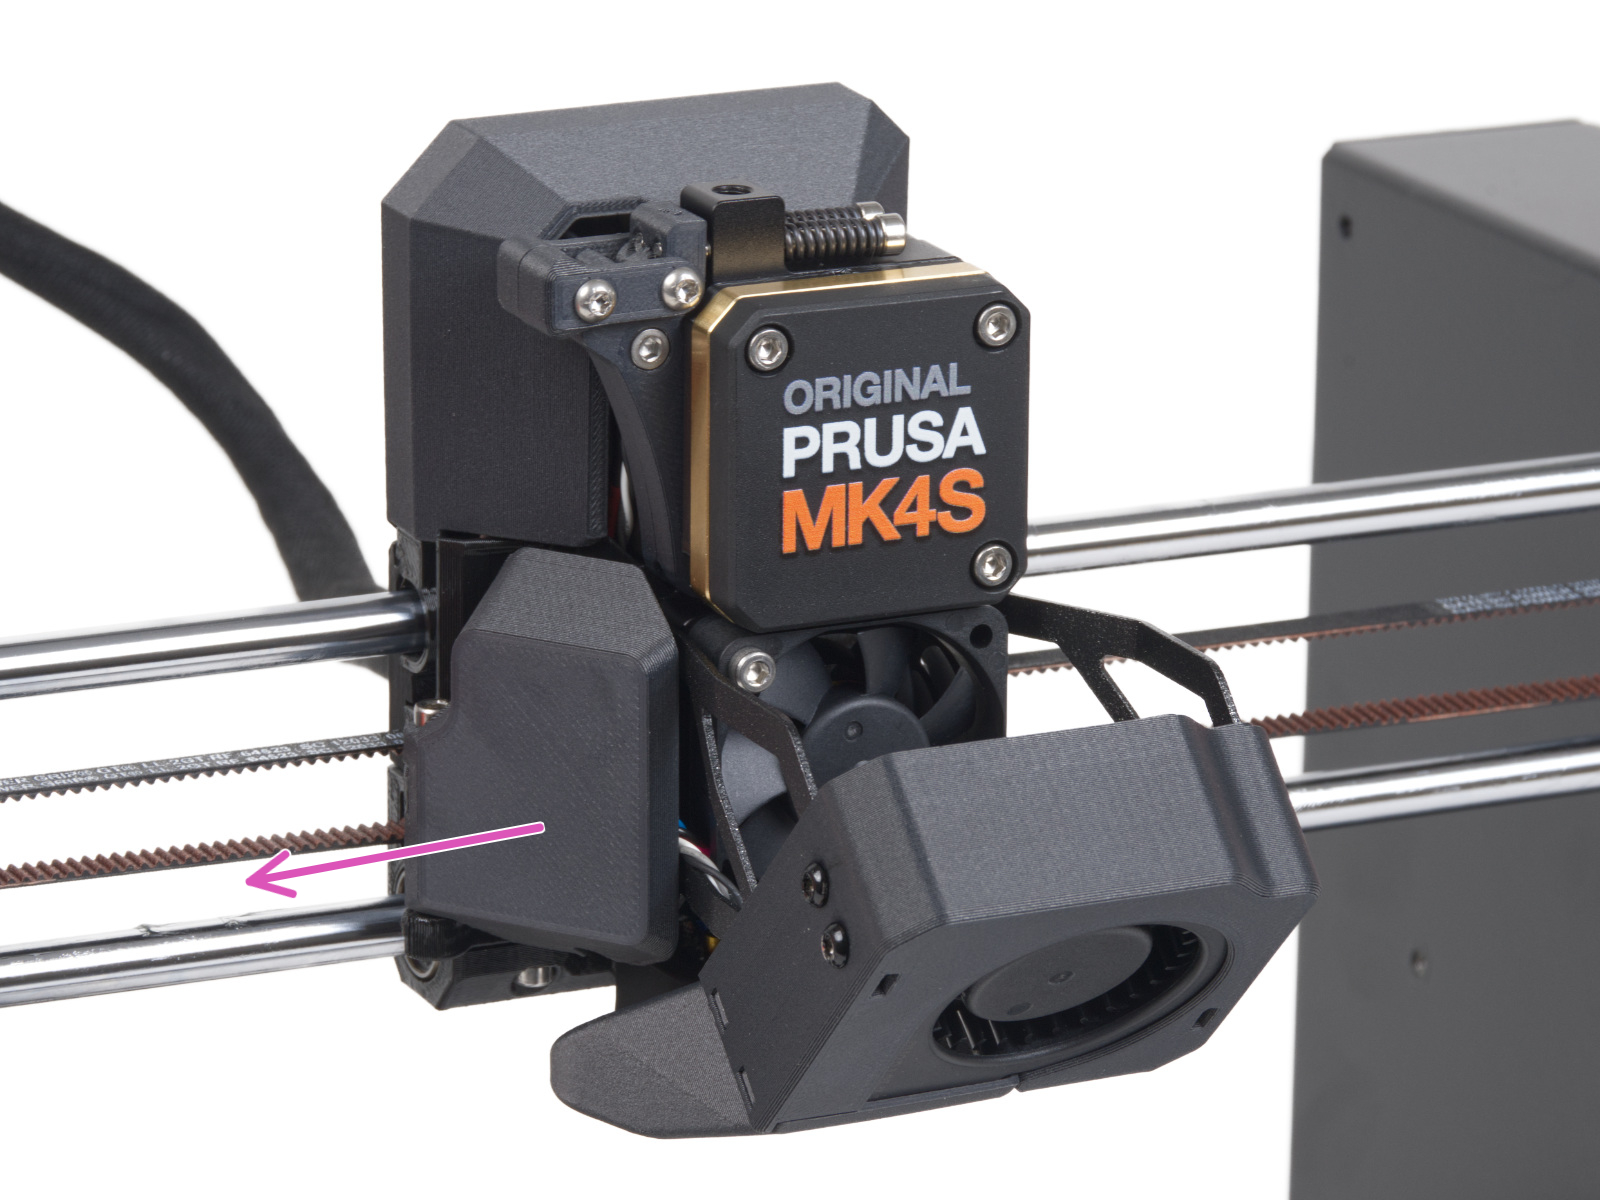
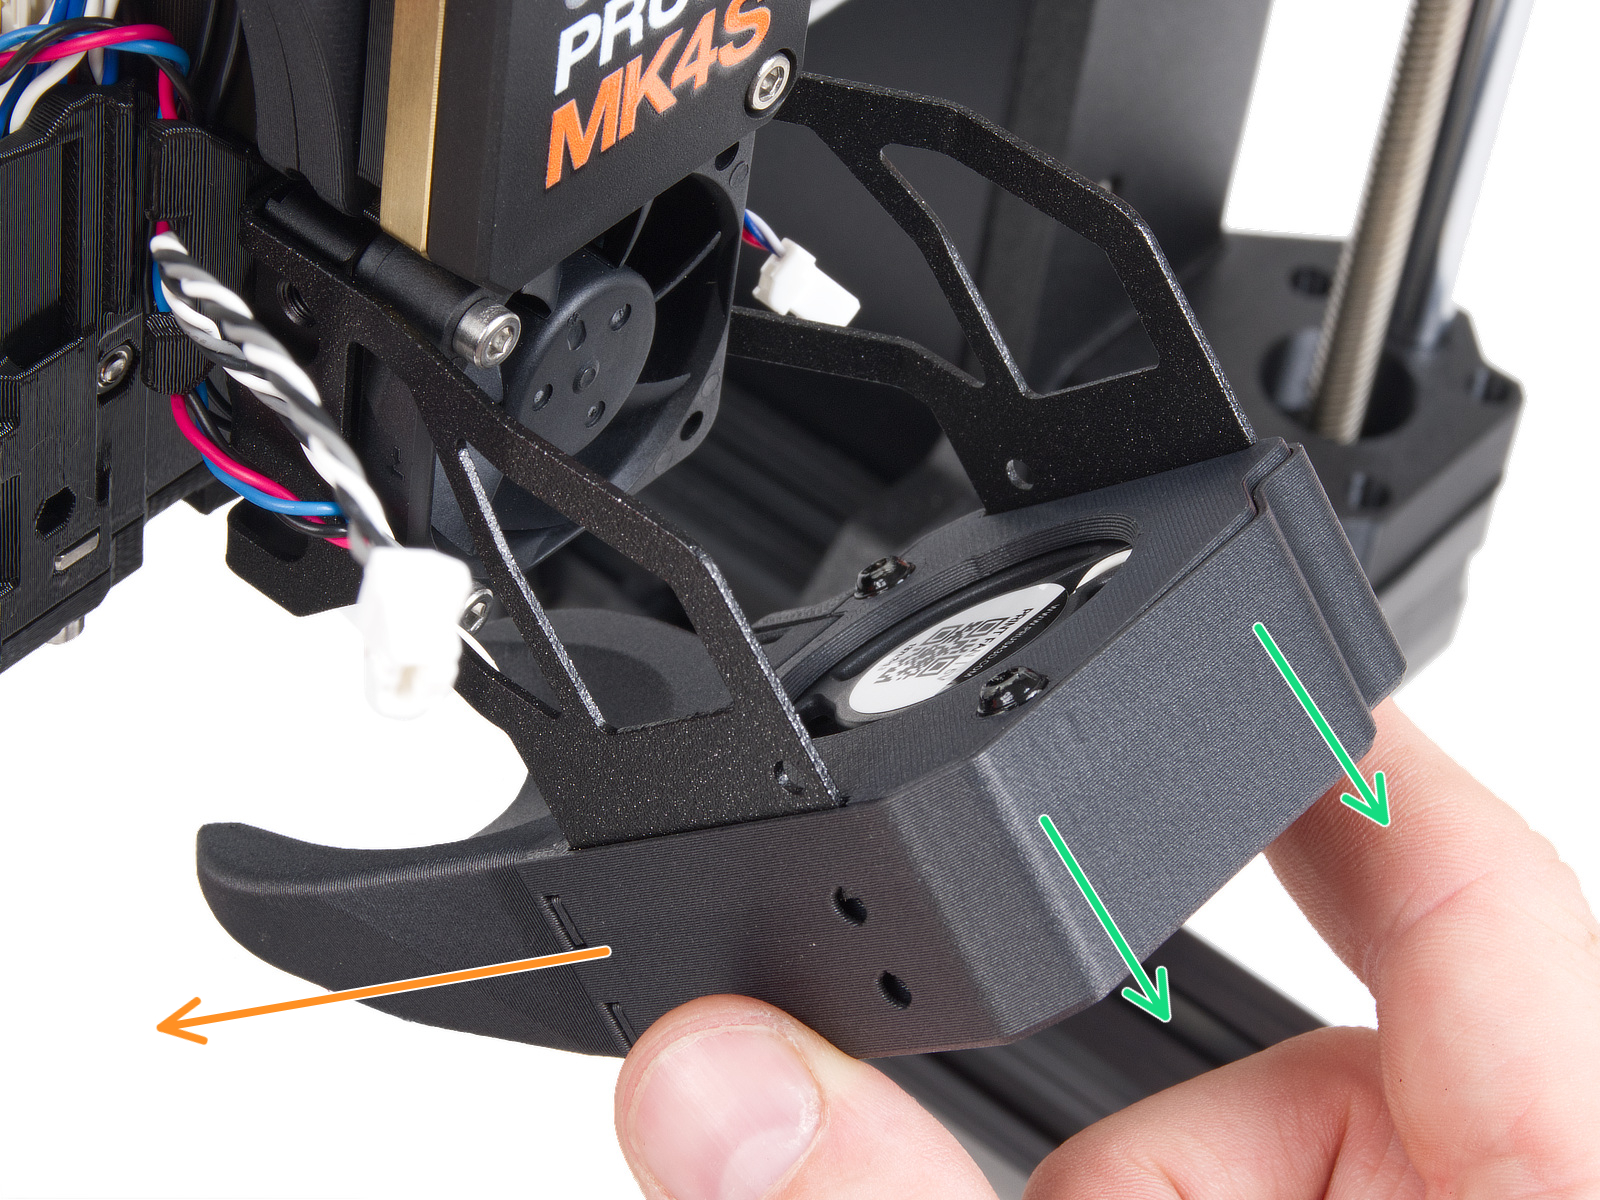
- Slide out the print fan assembly, and place it to the left of the hotend. Be careful to not excessively pull or pinch the attached cables.
Procedure
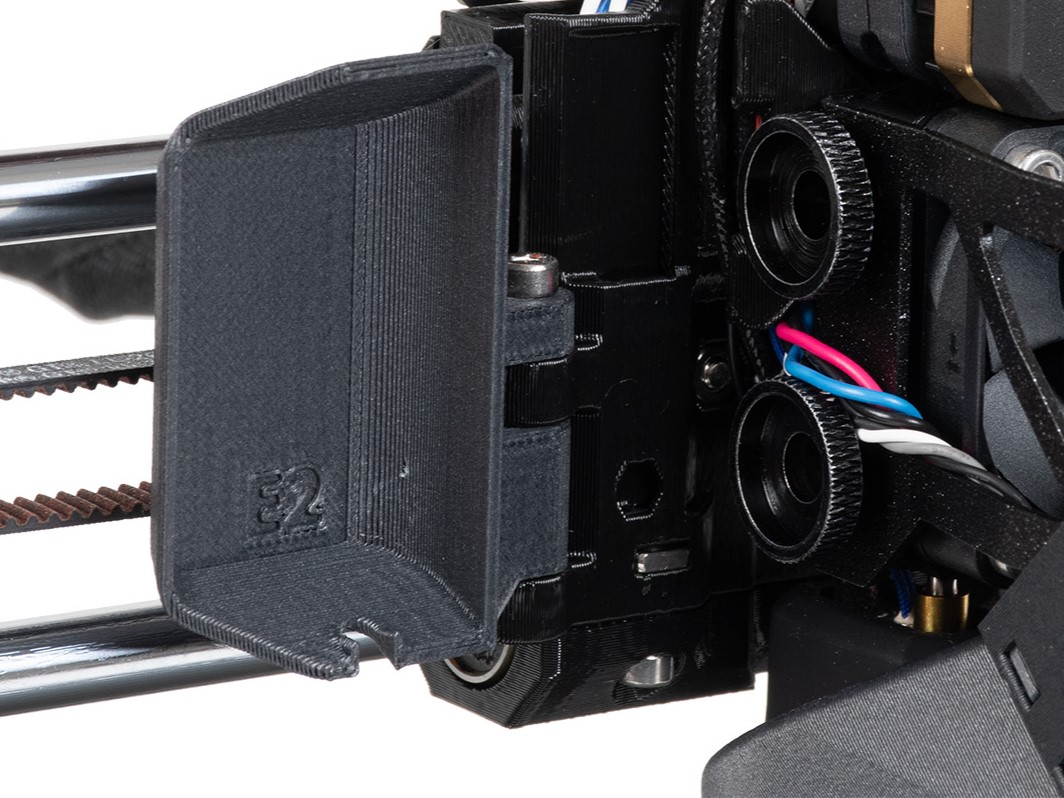
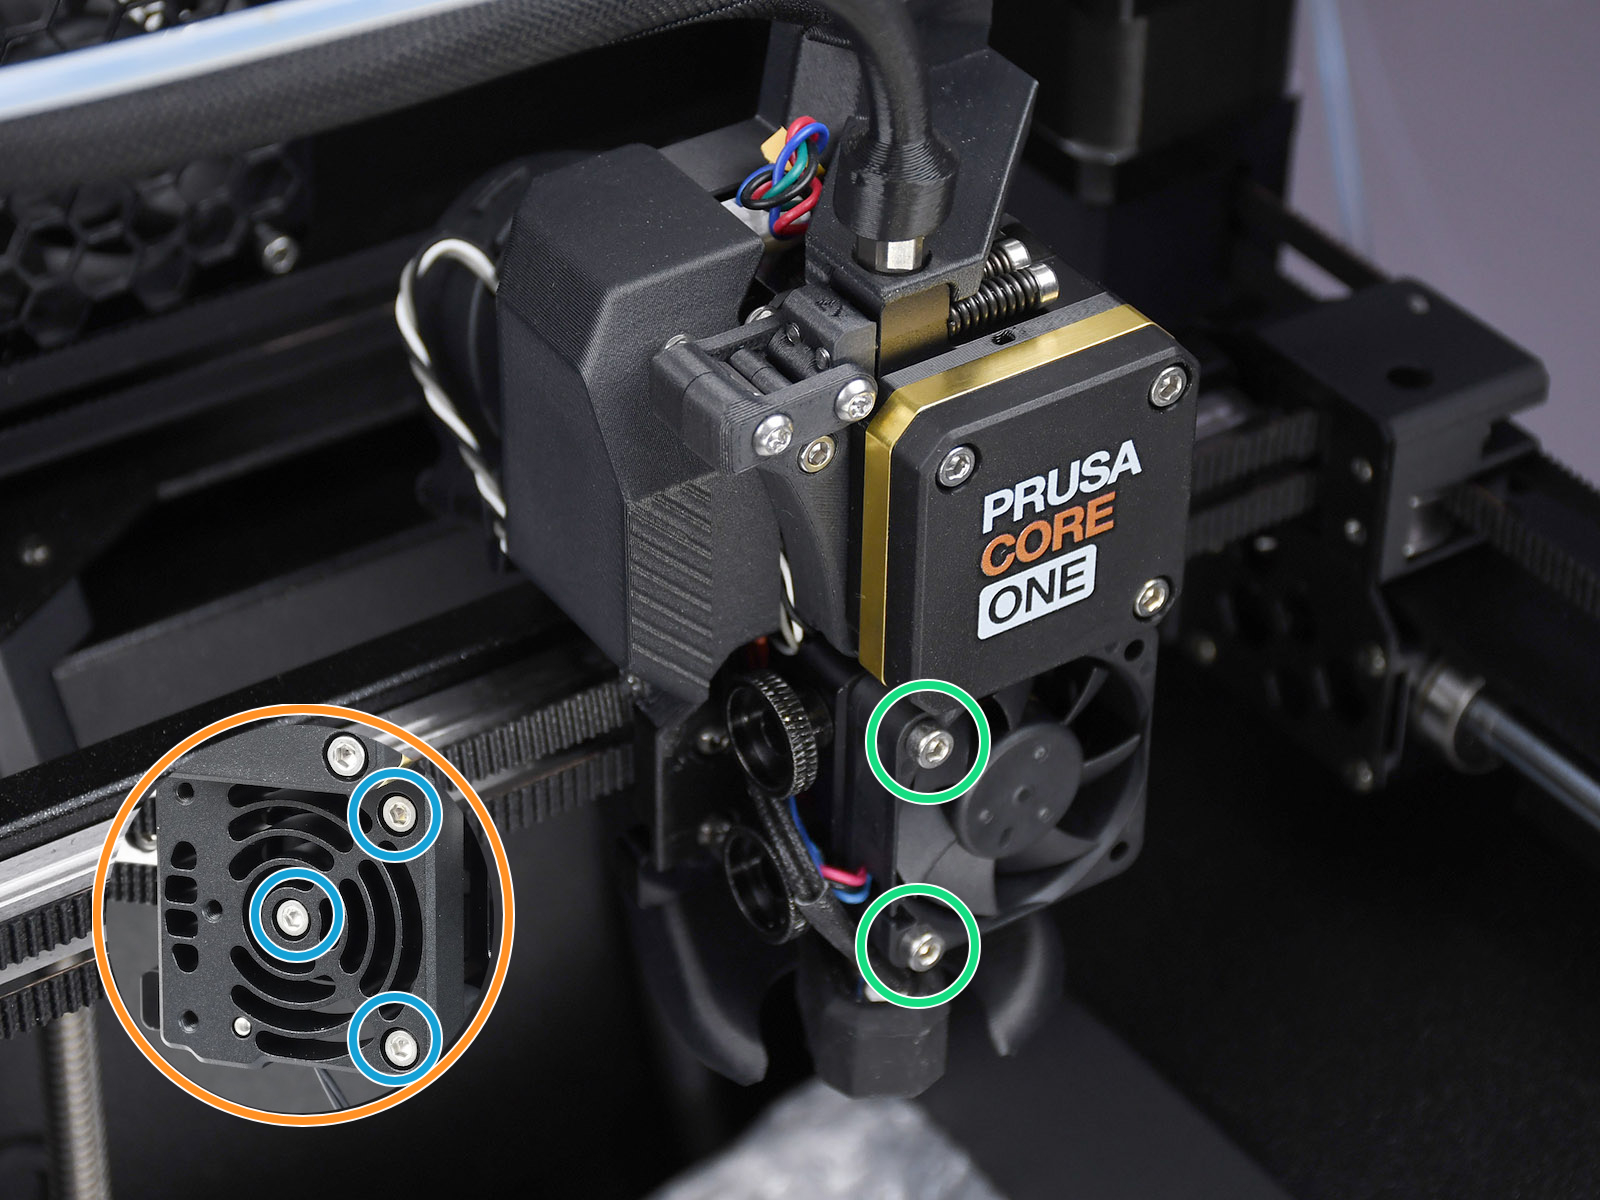
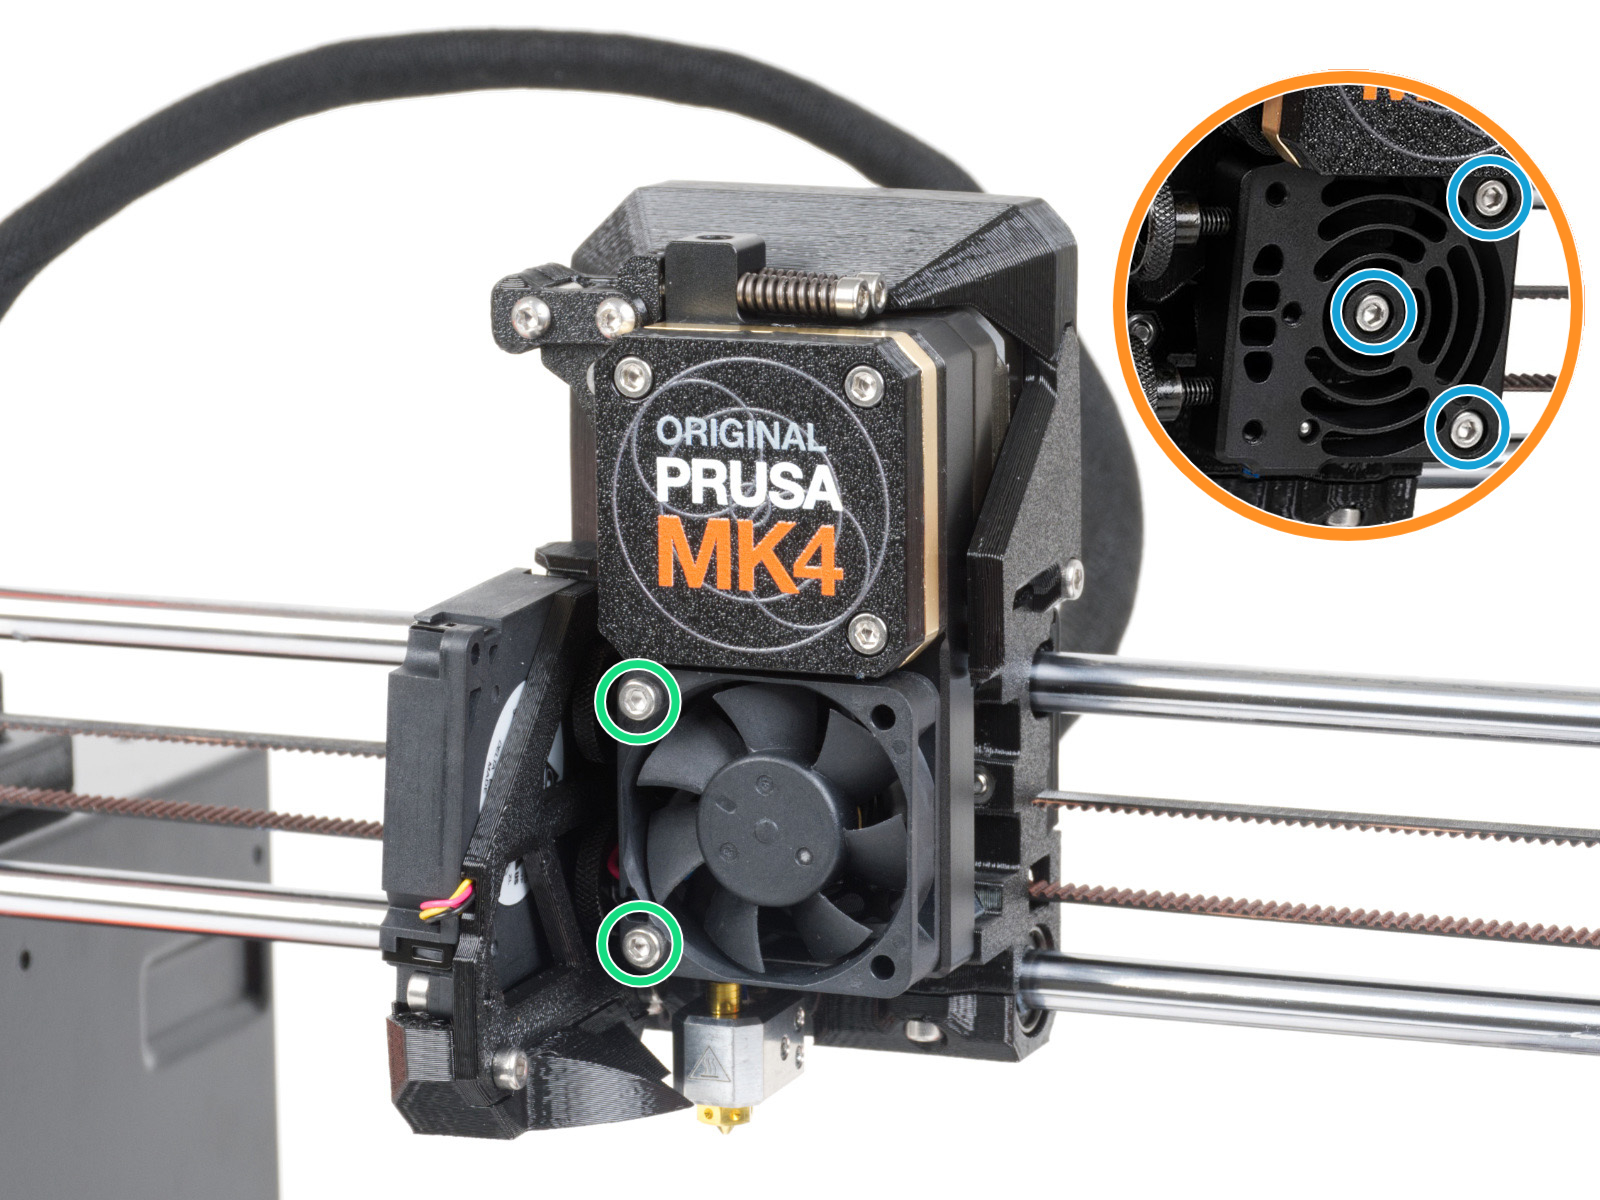
- Slightly loosen the two bolts holding the hotend fan. If this doesn't solve the issue, proceed to the next step.
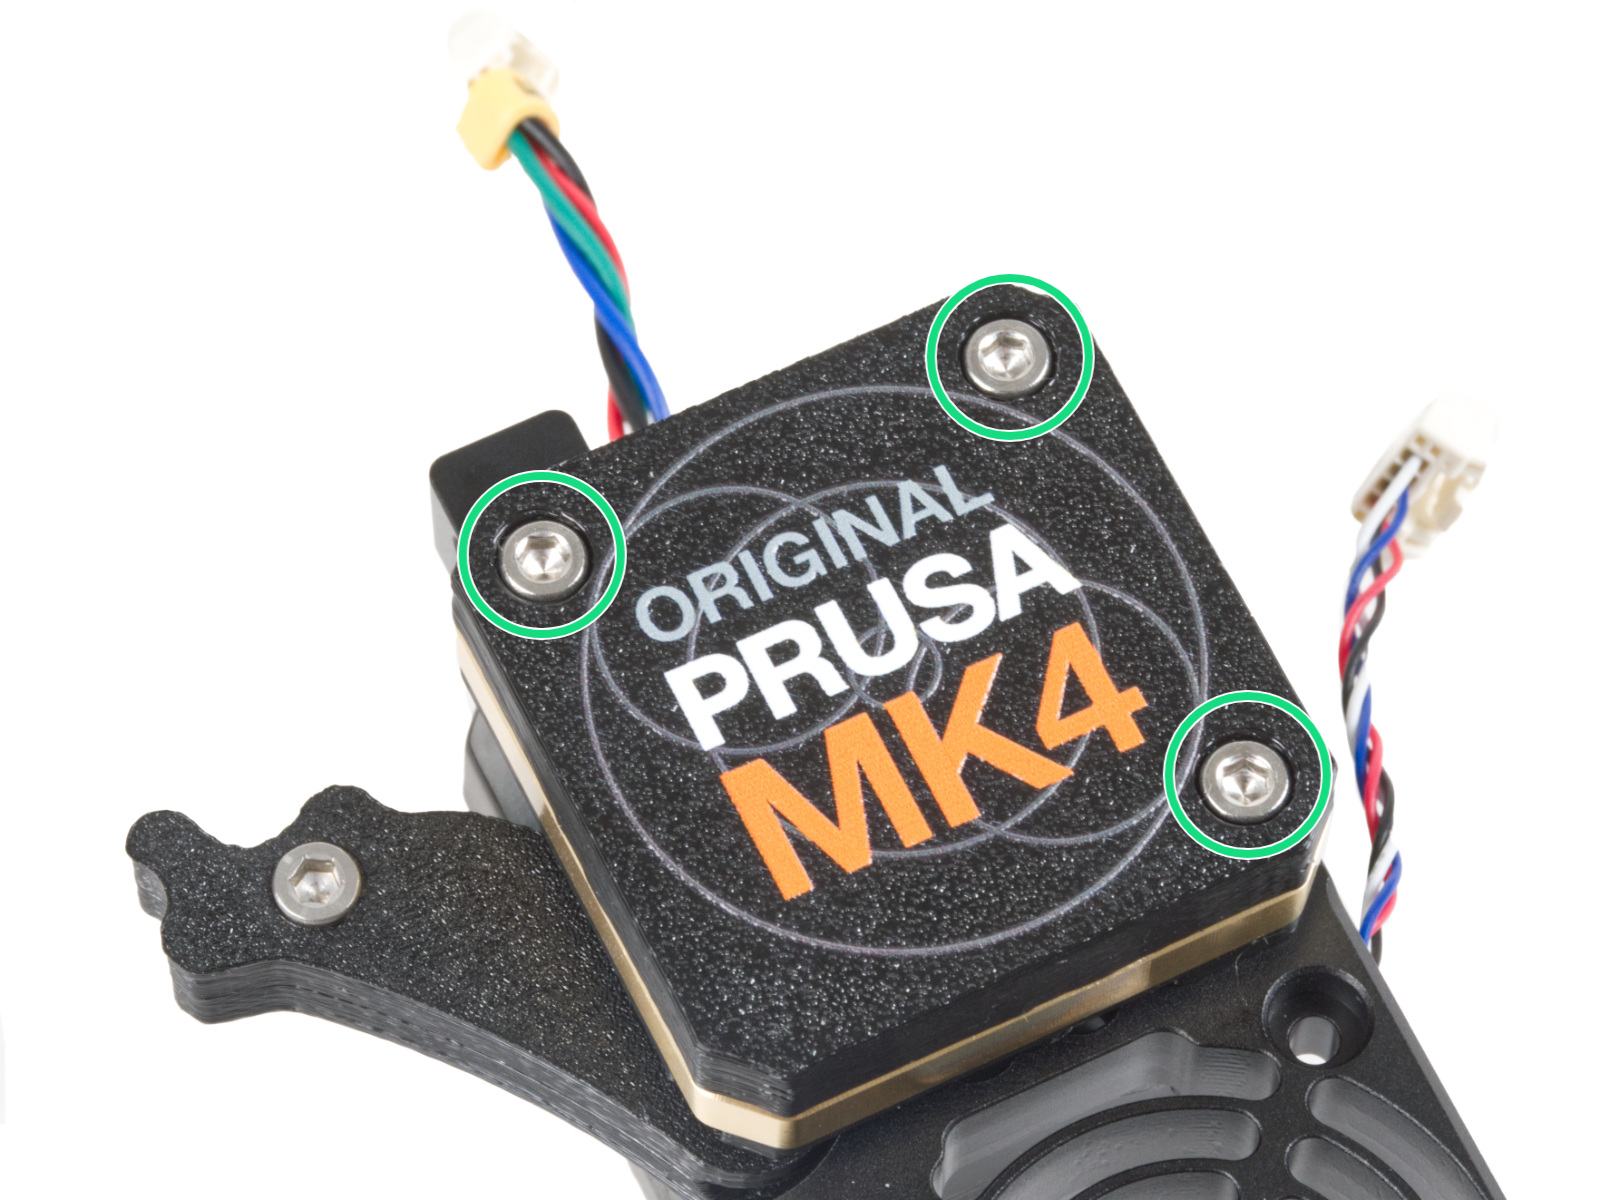
- Temporarily remove the hotend fan by removing the previously adjusted bolts. This will expose the heatsink/loadcell. Then, loosen very slightly the three bolts that hold the heatsink/loadcell in place.
 |  |
Loadcell white pad - visual check
PG-assembly-adapter printed with MK4/S
PG-assembly-adapter printed with MK3/S/+
- If any filament is loaded, unload the filament, then wait for the printer to fully cool down. After that, turn the printer off.
- Remove the PG-case, together with the PG-ring, gearbox, and main plate. Remove all of these parts in one piece.
 |  |
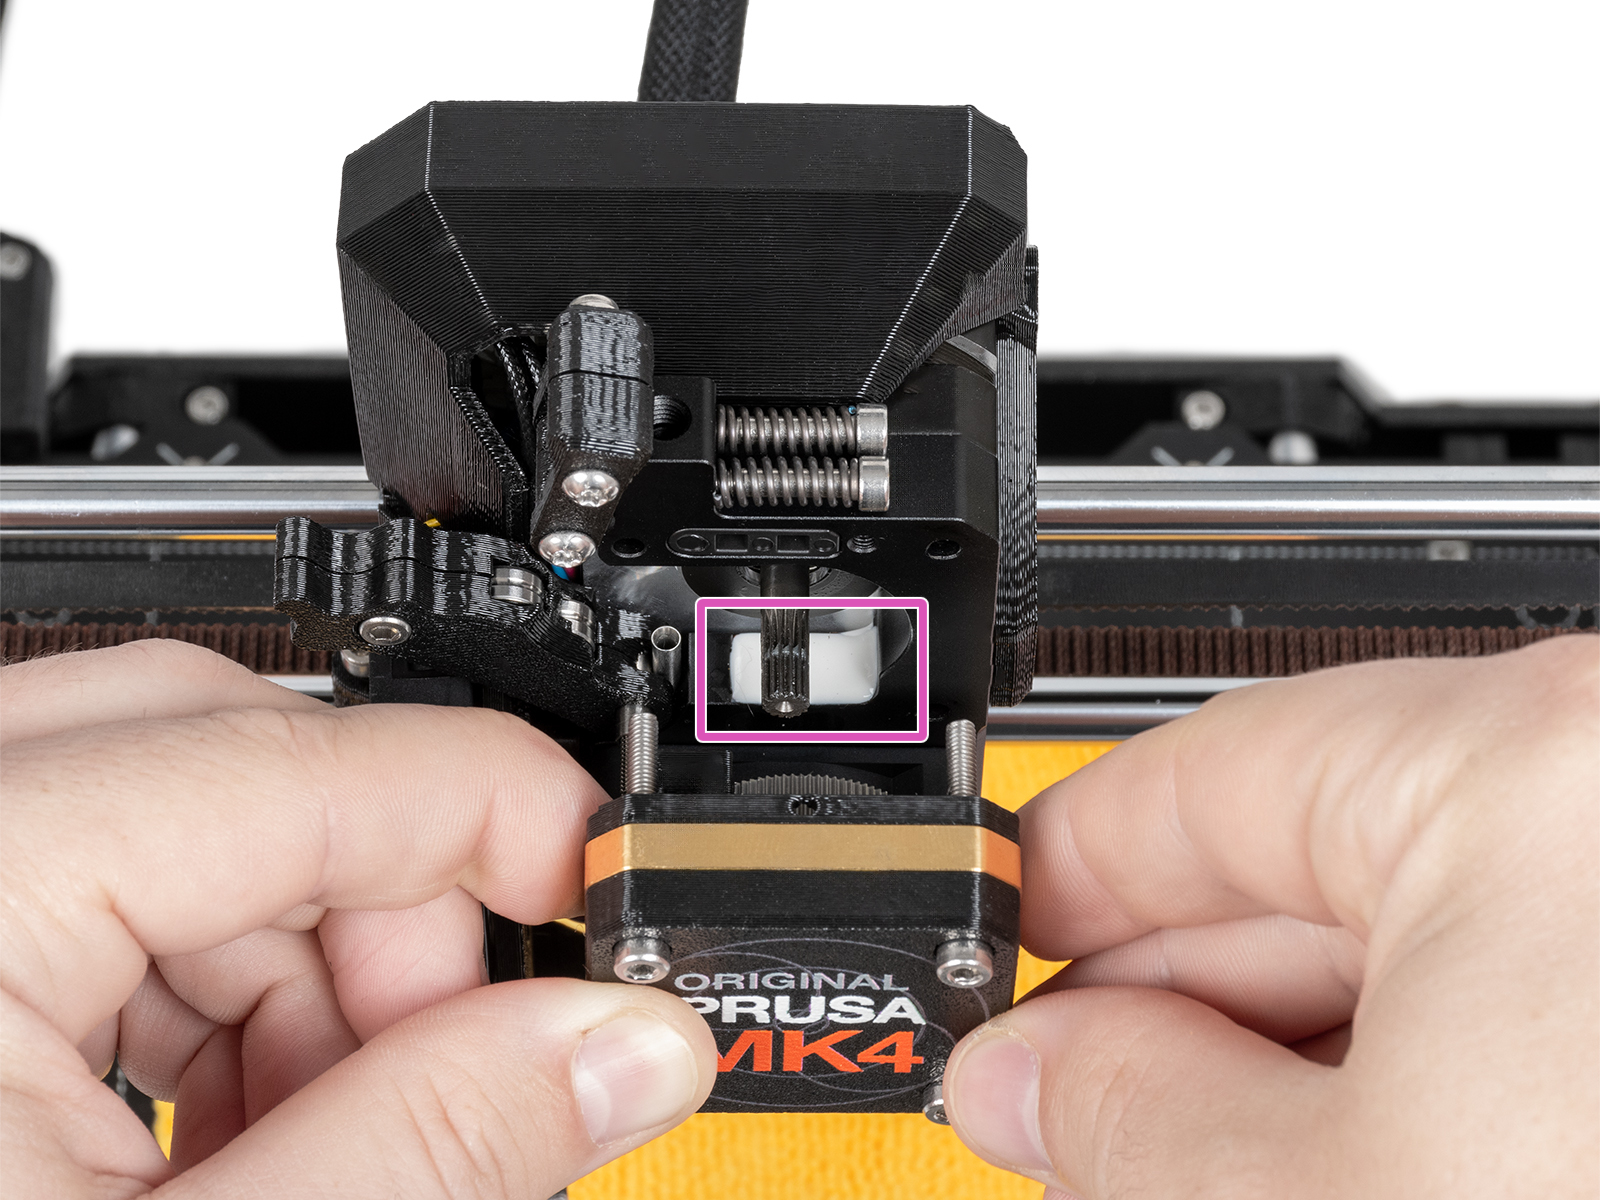
- The top part of the loadcell is now visible and has a white pad attached to it. Without touching the white pad, check it for damage.
- Reassemble the block of PG-case, PG-ring, gearbox, and main plate. In case the parts are not in one block, follow the dedicated steps from the Nextruder, depending on your printer version.
- Perform the gearbox alignment.
14 comments
Do I need to replace the entire load cell, or is it possible to replace only the white pad?
Thank you for your help.
What would you recommend I do to troubleshoot this issue?
Also, when you mention replacing the "entire heatsink," do you mean the complete heatsink assembly with the load cell already installed? Could you please send me the link to the exact part you are referring to?
The heatsink for you is this one - https://www.prusa3d.com/product/hotend-heatsink-3/
We already tried the load cell calibration from Control → Calibrations & Tests. However, after the beep, when we press the nozzle with our finger as instructed, the printer does not detect any force and no response is registered.
Because of this, it seems that the load cell is not working properly. Is there any additional test you would recommend?
Unfortunately, the part is currently out of stock in your online store. Do you know where I could purchase it, or when it is expected to be available again?
Would it also be possible to order it directly through Prusa Support?
Meanwhile you can try contact our support via livechat if they can help you.
https://help.prusa3d.com/es/article/atencion-al-cliente_2287
Un saludo,