日本語
Login
3Dプリンター
マテリアル
部品 & アクセサリー
ソフトウェア
3Dモデル
応用事例
コミュニティ
ヘルプ
アカデミー
ブログ
会社概要
サポート
Original Prusa MMU2S
Original Prusa i3 MK3S to MMU2S [進行中の翻訳]
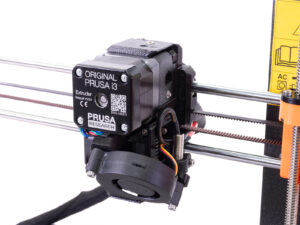
2A. MK3S+ extruder disassembly | プリンタの準備
1. プリンタの準備
Step 1 of 10 (Chapter 2 of 14)
フルスクリーンモード
内容
コメント
始める前に
確認すること:
⬢
the filament is unloaded from the hotend
⬢
プリンターが適切に冷却されていること
⬢
print head is at a height it is easily accessible at.
⬢
プリンタのプラグが抜かれている
⬢
you removed the steel sheet
This chapter is dedicated
only
to the
MK3S+ owners
.
Loading...
次
内容
Original Prusa i3 MK3S to MMU2S [進行中の翻訳]
1. はじめに
2A. MK3S+ extruder disassembly [進行中の翻訳]
プリンタの準備
Releasing the cable bundle
Unplugging the IR filament sensor cable
X-carriage-back disassembly
FS-cover and hotend fan disassembly
Extruder-body release
Extruder-idler disassembly
Extruder-idler disassembly
ここで、Haribo休憩タイムです!
Testing, testing!
2B. MK3S/MK2.5S - extruder disassembly
2A. MK3/MK2.5 - extruder disassembly
3A. MK3S+ extruder upgrade
3B. MK3S/MK2.5S - extruder upgrade
3A. MK3/MK2.5 - extruder upgrade
4. Idler body assembly
5. Pulley body assembly
6. Electronics and MMU2S unit assembly
7. Spool holder and buffer assembly
8. Preflight check & Calibration
9. First flight
Manual changelog MMU2S
コメント
ログイン
してコメントを投稿する
コメントなし