What happened?
During calibration, mesh bed leveling, or before a print, it is crucial for the printer firmware to determine the print head and heatbed position. This is done through the homing process, where the print axes move to a known reference position, called home.
For the Z axis, two homing attempts are performed. The MINI/+ firmware uses the MINDA/SuperPINDA probe readings of their distance to the steel sheet: the homing process passes if the two readings are within +- 0.1mm. If not, the printer will show the message "Homing Error".
Error name: Homing Error
Error code: #12301
How to fix it?
The error might indicate an issue with the MINDA/SuperPINDA probe. Its cable can be damaged or disconnected. A mechanical issue on the Z-axis might also trigger this error.
Testing the MINDA/SuperPINDA probe
Follow the steps in the following article: M.I.N.D.A./SuperPINDA sensor testing (MINI/MINI+).
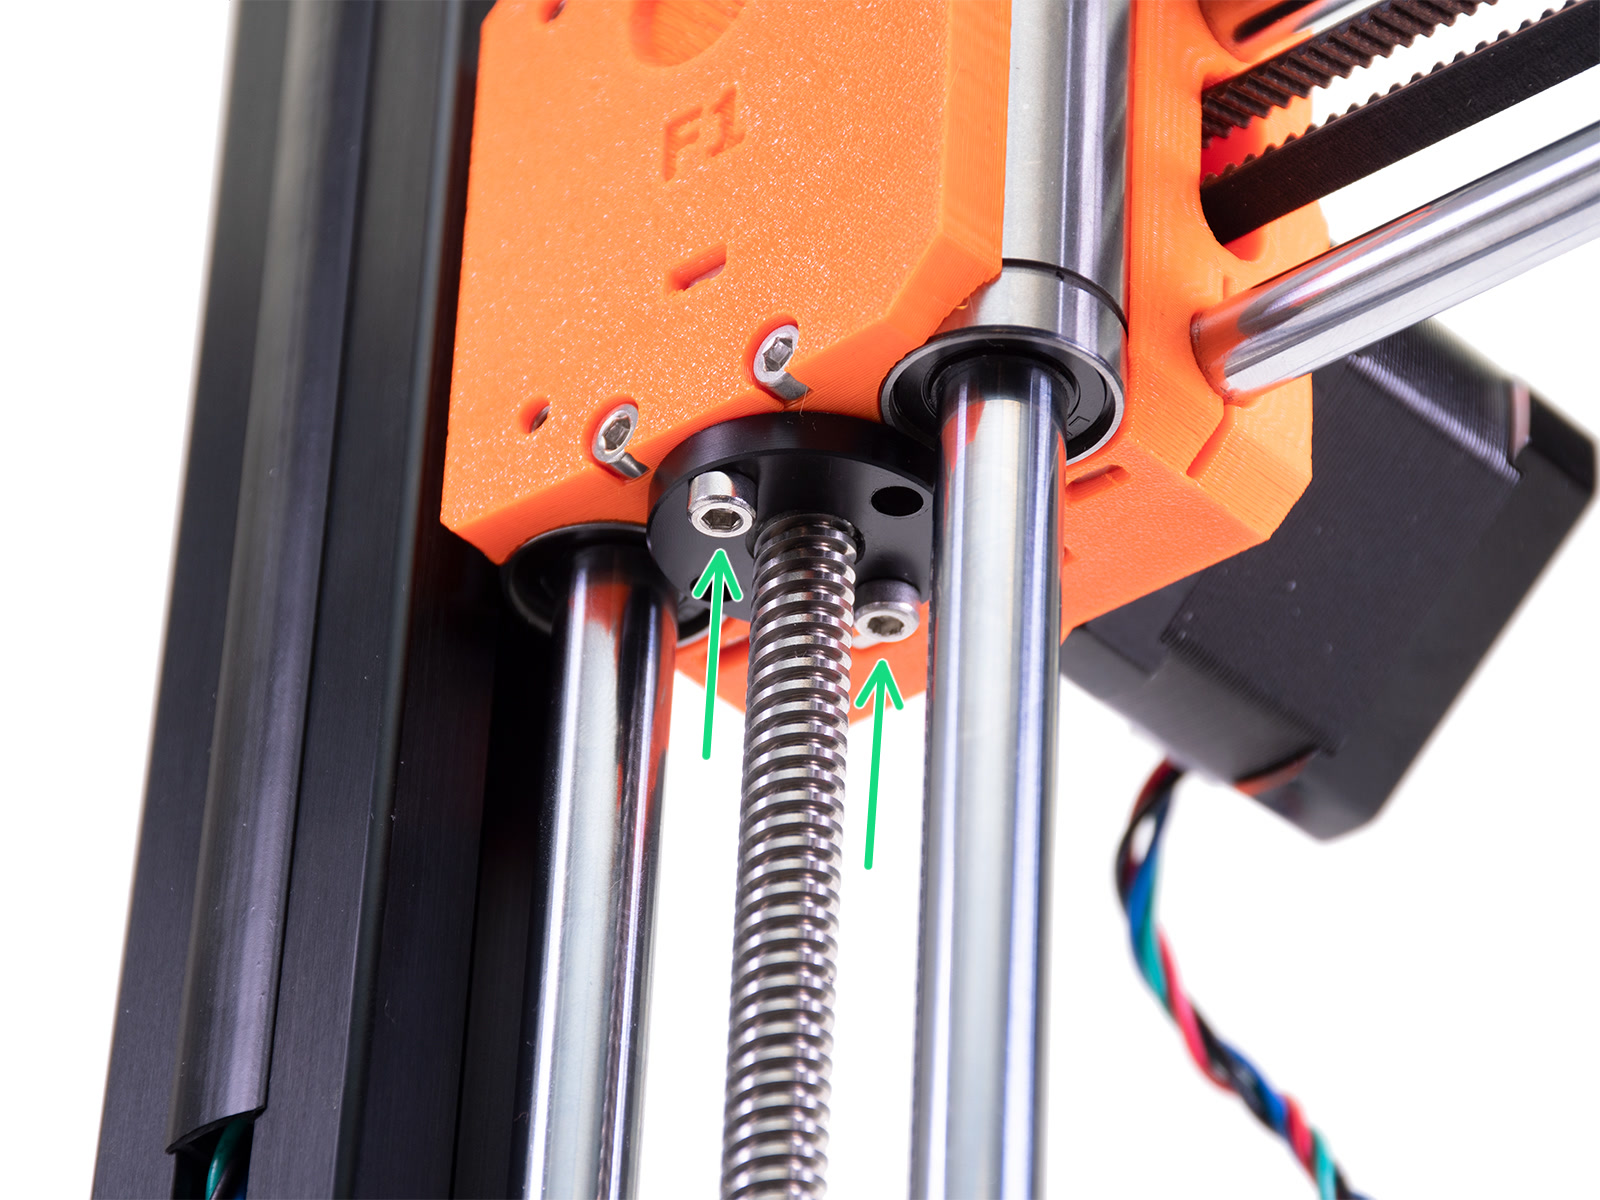
Z-axis movement
Ensure that the Z-axis can move smoothly. With the printer switched off, check the Z-axis and trapezoidal nut assembly:
- Loosen the bolts on the trapezoidal nuts, and check that both bearings are inserted correctly. The bearings must not protrude from the printed parts.
- Check both the printed parts Z-carriage and Z-carriage-back to see if one is positioned lower than the other. The two parts must be at the same height.
- Tighten the trapezoid nut evenly on both sides.
- Test the Z-axis movement by rotating with two fingers the Z-motor leadscrew. If you feel excessive resistance, slightly loosen the screws that hold the trapezoid nut.
MINDA/SuperPINDA probe visual inspection
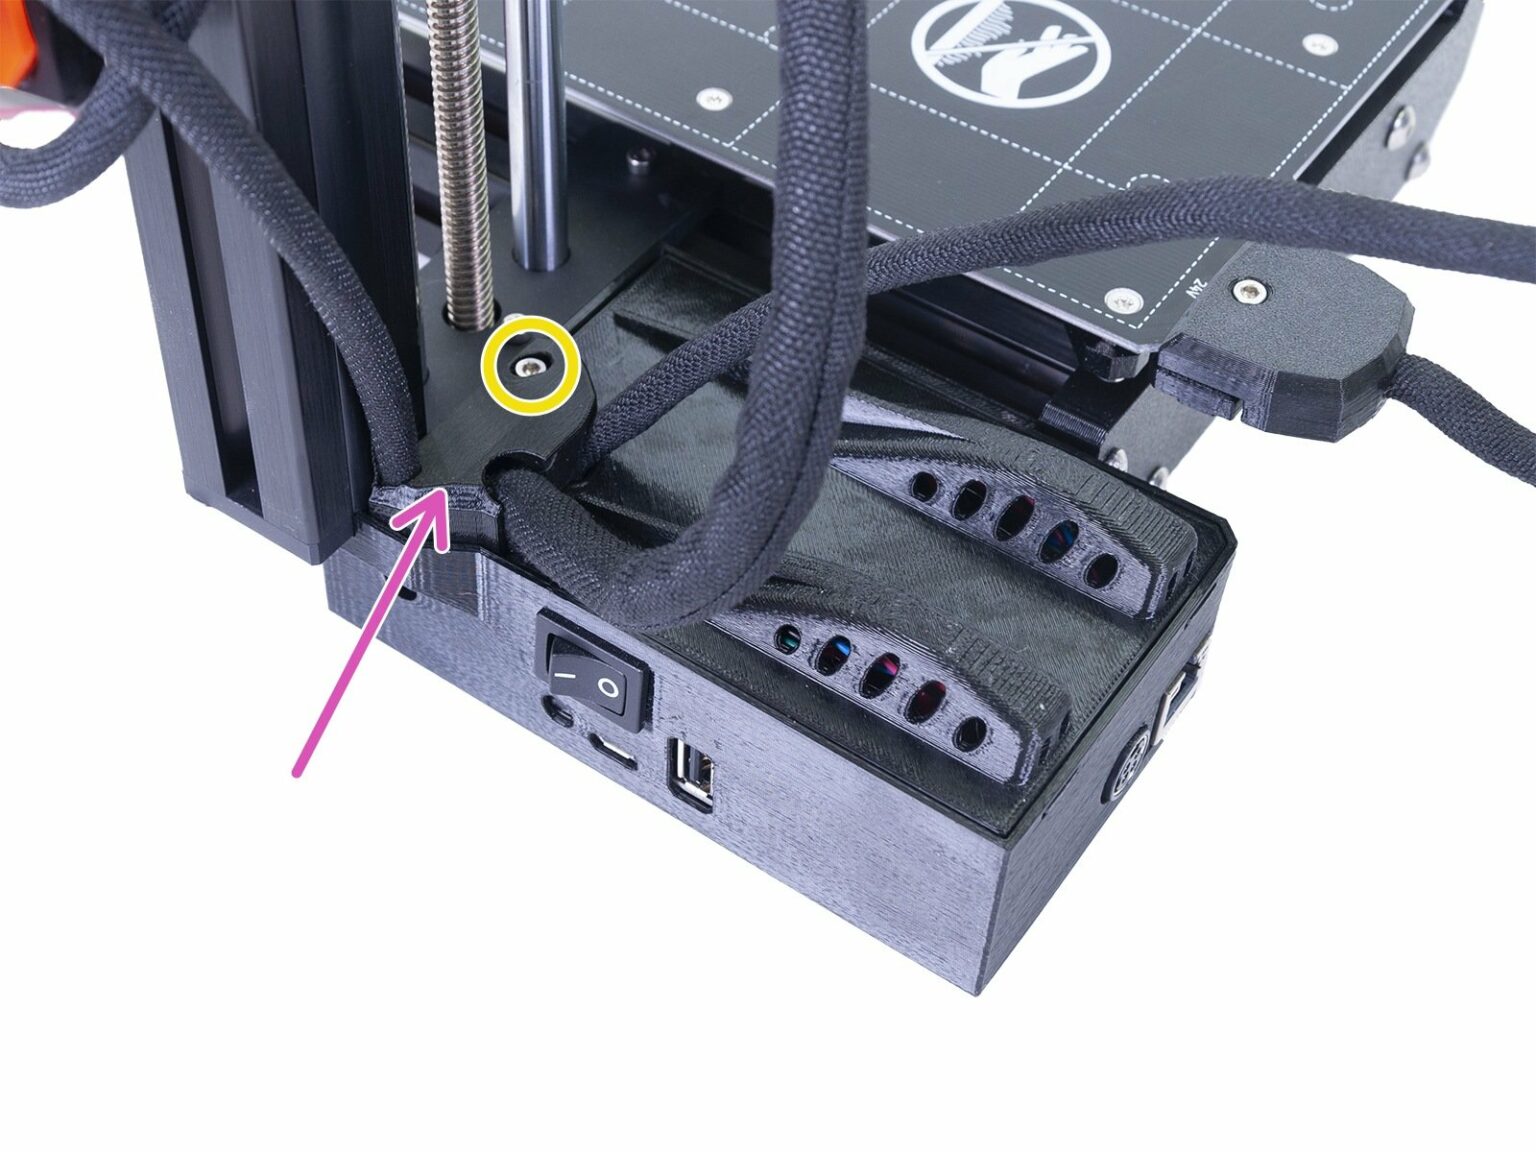
Before testing the MINDA/SuperPINDA probe, you should check that the MINDA/SuperPINDA probe wires are not visibly broken. Also, make sure everything is connected to the Buddy mainboard, inside its case. Loosen the screw securing the cover (circled in the picture below), remove the top cable cover, and flip it open to reveal the board.
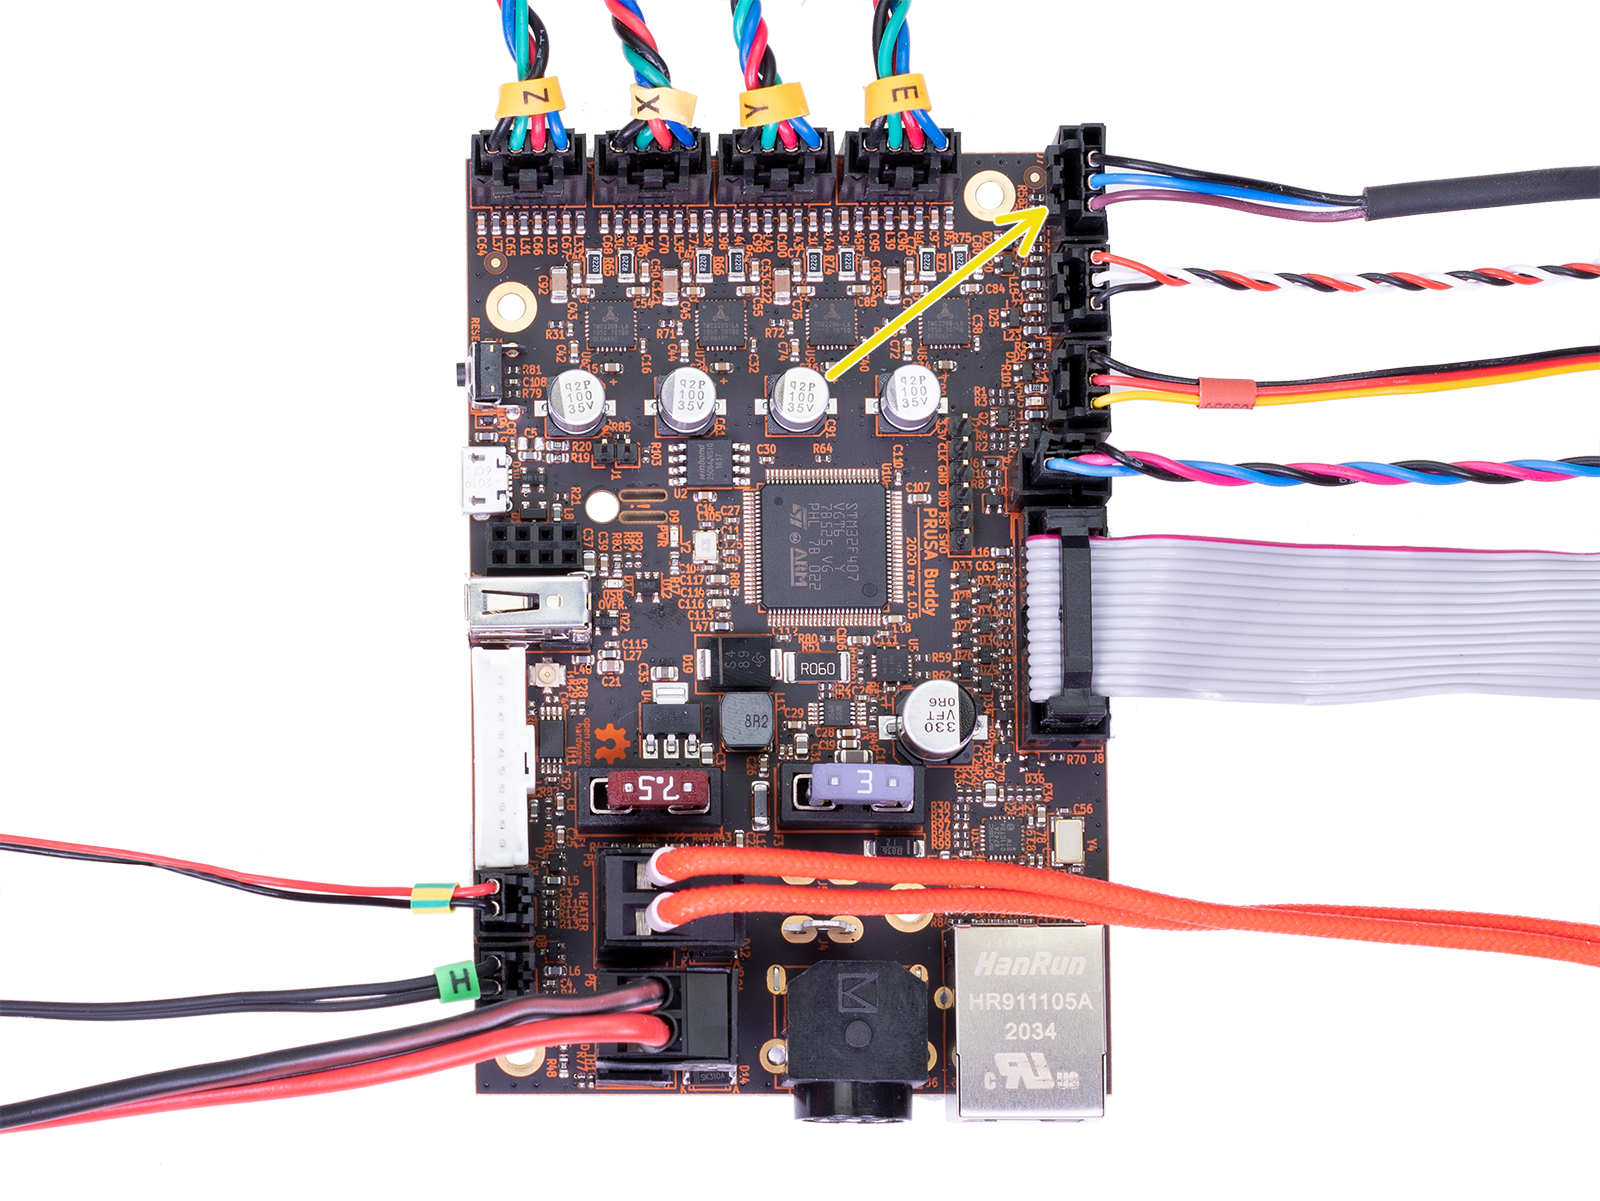
Check that all the connectors are secure in their sockets, according to the picture below. Focus on the MINDA/SuperPINDA (yellow arrow). Though unlikely, rough shipping or handling could have shaken the MINDA/SuperPINDA cables loose.
Parts replacement guide
In case you find the MINDA/SuperPINDA probe to be faulty, please order it using our e-shop, then follow the service guide: How to replace SuperPINDA (MINI/MINI+).
1 comment